How to Add an iMessage Text Scene in Premiere Pro (2026)
Sooner or later every editor gets the request: "Can we show the text she gets here?" A conversation on screen tells a story faster than any line of dialogue, and a notification sliding in at the right moment can carry a whole plot point. In a Premiere Pro project, the hard part is not the editing. It is getting a believable, animated iMessage onto the timeline in the first place.
Recording a real phone is fiddly, and building bubbles by hand with the Essential Graphics panel takes an afternoon per scene. This guide shows a faster route: animate the conversation in MockClip, export it in a format made for overlays, and drop it on a track above your footage. It covers three cases: notification banners over footage, a full chat screen in the frame, and a phone held in shot.
Three ways to put a text scene in your edit
| You want | Export from MockClip | In Premiere |
|---|---|---|
| Notification banners over footage | iMessage notification, Background → Transparent, MOV · ProRes 4444 | Place on V2 above your footage |
| The same, without alpha support | iMessage notification, Background → Chroma Key, MP4 | V2 plus Ultra Key |
| A full chat conversation | iMessage chat, MP4, bezel on or off | Scale and position in the frame |
| A phone held in shot with the chat on it | iMessage chat with a hand-held scene, MP4 | Use as a cutaway clip |
The first option gives the cleanest result and is where most editors should start.
Step 1: Animate the conversation in MockClip
For notification banners
- Open the iMessage notification template.
- Add a banner for each message: sender name, preview text, the delay before it appears and how long it stays. Choose whether banners slide up or fade out when they leave.
- Pick a light or dark theme to match the shot. A dark scene usually wants the dark theme.
- Set Background to Transparent (Alpha Channel).
- Untick Show iPhone Bezel if you want only the banners. Leave it on if you want a phone frame in the overlay.
- Under Frame & export, set Export Format to MOV · ProRes 4444 (transparent) and Quality to Full HD, then press Export.
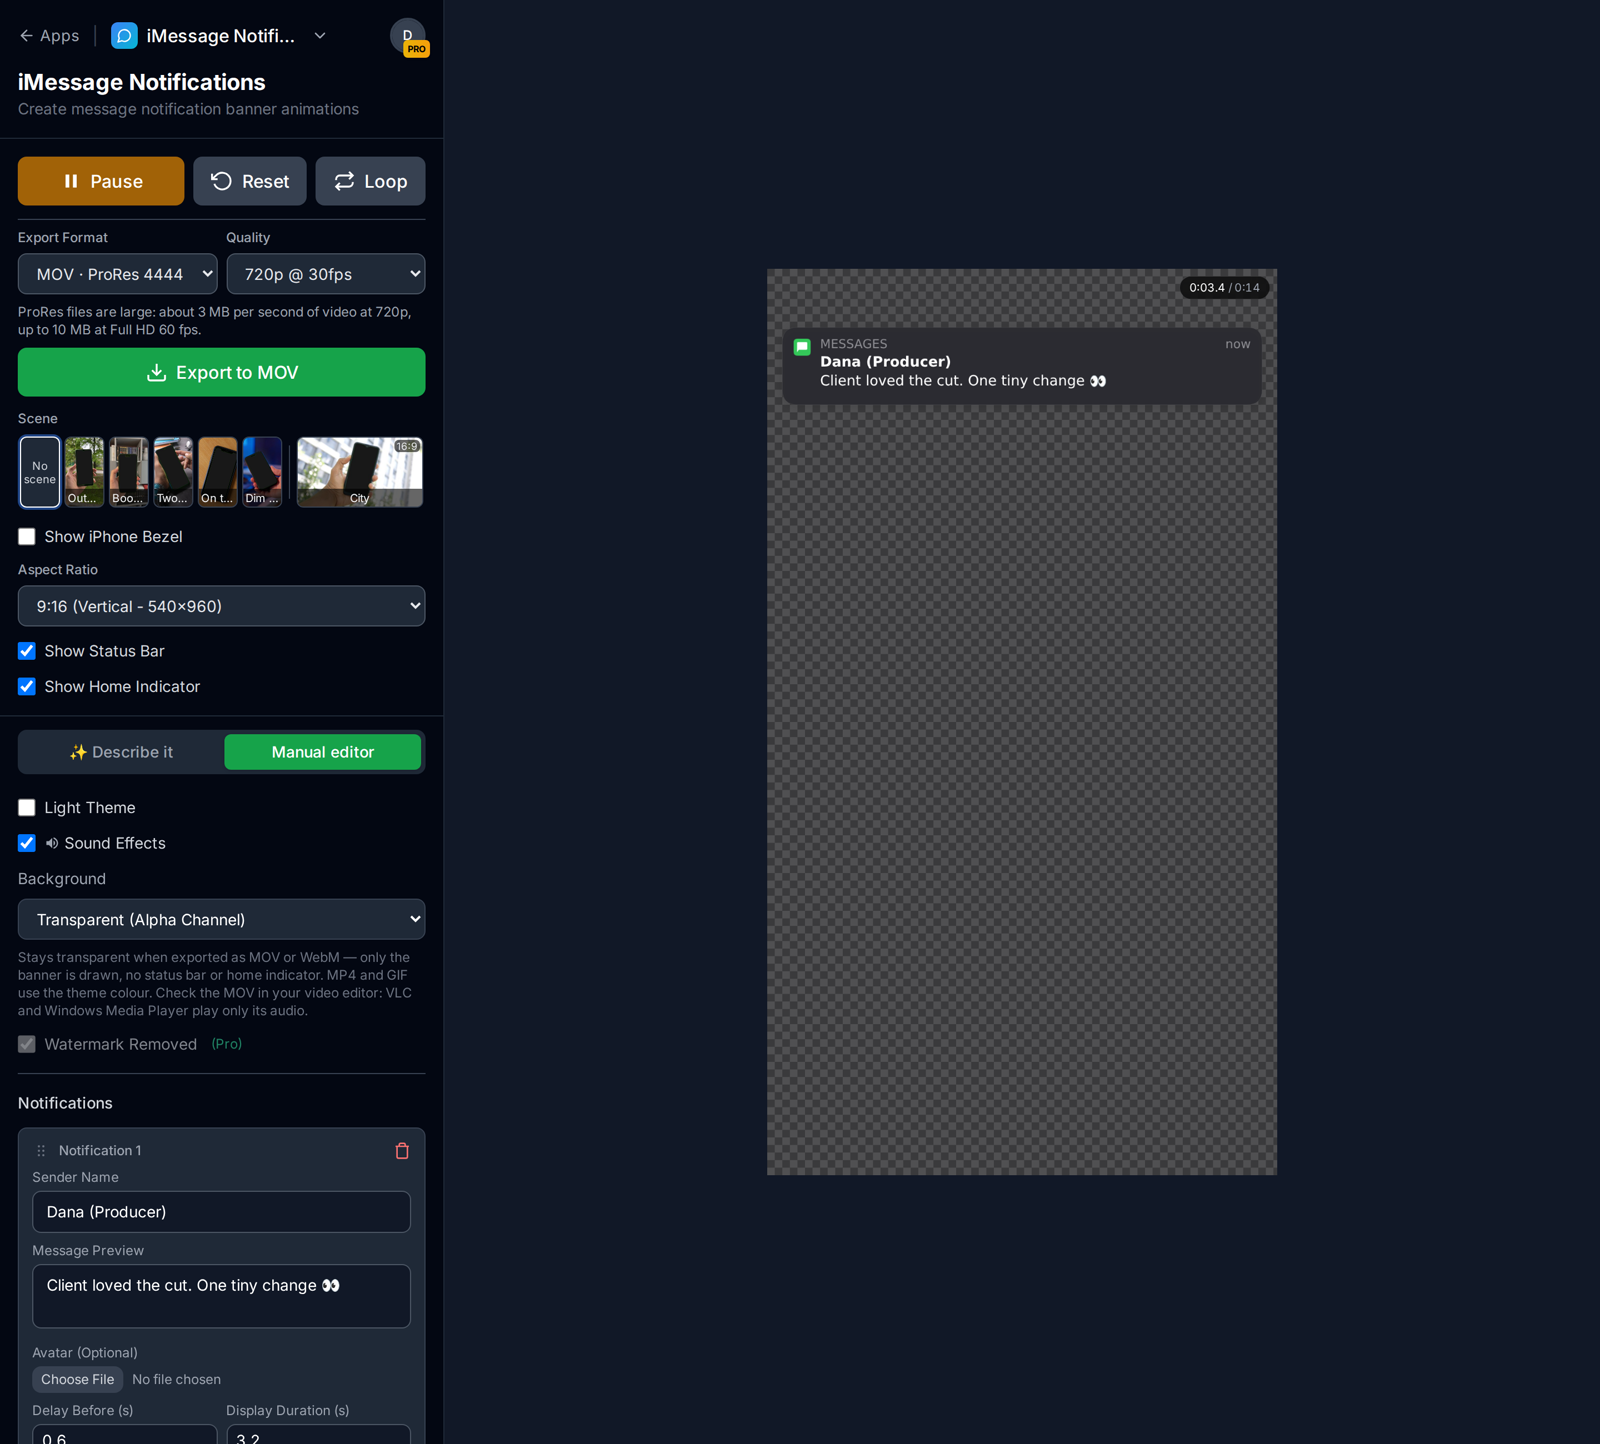
The file renders in your browser and downloads. Expect a much bigger file than an MP4: ProRes 4444 stores near-lossless frames plus the alpha channel. The phone call notification template works the same way if the scene needs an incoming call instead.
Do not judge the file in VLC or Windows Media Player. Those players cannot decode ProRes 4444 with alpha and may show black or play only the sound. Judge it on the timeline.
For a full chat screen
Open the iMessage chat template instead, write the messages, and export an MP4. Decide on the frame first:
- Bezel on gives you a phone floating in the frame, good for explainer videos and social edits.
- Bezel off with the 9:16 or iPhone format gives you just the screen, which is what you want if you plan to place it into a phone in your footage yourself.
The iMessage tutorial covers typing indicators, tapbacks and read receipts in detail.
Step 2: Bring it into Premiere Pro
- Import the file (drag it into the Project panel or use File → Import).
- Drag it onto the timeline on V2, above the footage on V1, at the moment the first message should appear.
- Select the clip and open Effect Controls. Under Motion, adjust Position and Scale to place the banners. Notification banners normally sit near the top of a phone screen, but in a full-frame edit they can go wherever the composition needs them.
- Play it back. Everything outside the banners shows the footage underneath.
If the background is black instead of transparent, right-click the clip in the Project panel, choose Modify → Interpret Footage, and check the alpha channel settings: the alpha must not be ignored. If it still shows black on your setup, skip to the green screen route below; it gives the same result with one extra effect.
Sequence settings matter. If your project is a vertical 9:16 edit for Reels or TikTok, create a 1080×1920 sequence. MockClip's Full HD 9:16 export is 1080×1920, so a bezel-less export fills the frame exactly.
Step 3 (alternative): The green screen route with Ultra Key
Some workflows prefer an MP4: lighter files, faster proxies, or a machine that will not read the alpha. Export the same notification with Background set to Chroma Key (Solid Color) (pure green by default, any colour you like), with Show Status Bar and Show Home Indicator unticked so only the banners sit on the green, then:
- Place the MP4 on V2 above your footage.
- In the Effects panel, find Keying → Ultra Key and drag it onto the clip.
- In Effect Controls, use the Key Color eyedropper and click the green.
- If you see a thin fringe around the rounded corners, raise Choke slightly under Matte Cleanup, and adjust Spill Suppression if the banner edges pick up green.
Because MockClip draws the background as one perfectly flat colour, the key is far easier than a filmed green screen: there are no shadows or creases to deal with. The green screen notification guide goes deeper on choosing a key colour that does not clash with your footage.
Step 4: Putting the chat onto a phone in your footage
When an actor holds a phone in the shot, the audience expects to see the message on that phone. Premiere can do a basic version of this:
- For a phone that does not move, add Distort → Corner Pin to the bezel-less chat clip and drag the four corners onto the phone's screen.
- For a phone that moves a little, keyframe the Corner Pin points every few frames. It works for short shots, but it is slow and the result wobbles if the hand moves much.
Real screen tracking is where most editors open After Effects. If you only need a believable "hand holding a phone" shot rather than your own footage, there is a quicker option: MockClip's hand-held scenes composite the chat onto real footage of a hand holding a phone, tracked and lit, in your browser. See phone screen replacement without After Effects.
A worked example: the producer's texts
The demo at the top of this post is a typical brief: a short behind-the-scenes edit for an agency's social channels, in which the editor is shown finishing a cut and three texts from the producer arrive one after another. Here is how it goes together in Premiere.
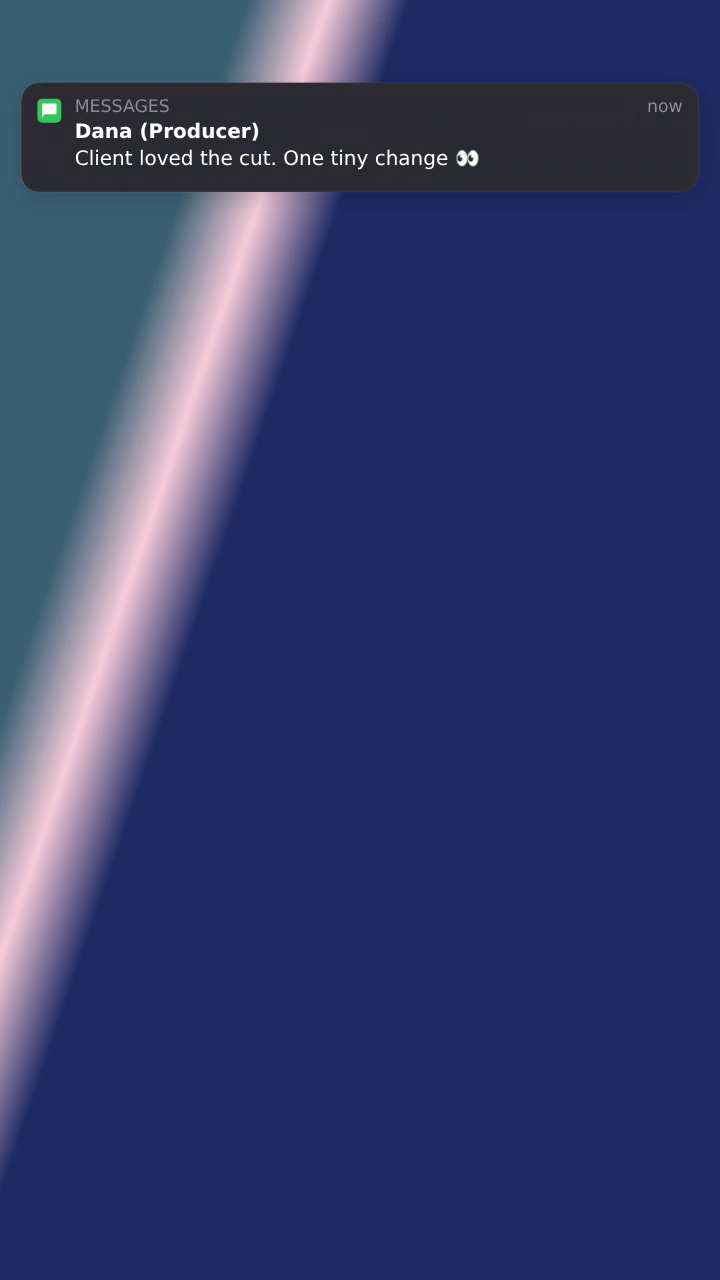
- Write the beats. Three banners from "Dana (Producer)": "Client loved the cut. One tiny change 👀", then "Can the logo be bigger? Like… a lot bigger", then "Kidding. Ship it 🚀". The joke needs the second banner to land and sit for a moment before the third arrives.
- Set the timing in MockClip. Half a second before the first banner, a short gap between the others, and a display time of a little over three seconds each, so they stack and then clear.
- Export once, transparent. Dark theme, bezel off, Transparent background, MOV · ProRes 4444, Full HD.
- Lay out the timeline. V1 holds the shot of the editor at the desk. V2 holds the MOV, starting on the frame the editor leans back. A1 has the room sound; A2 has the notification sounds from the MOV, lowered 6 dB under the music on A3.
- Place it. In Effect Controls, scale the MOV down so the banners sit in the upper third of the frame, clear of the editor's face, and nudge the position so they do not cover the monitor in the background.
- Review with the client. If the client wants different wording, change the text in MockClip, export again, and use Replace Footage on the clip in the Project panel. The new version takes the old one's place on the timeline with its position and scale kept.
The whole scene, from blank editor to placed overlay, takes about ten minutes, and the copy can change right up to delivery.
MockClip or Essential Graphics?
Premiere's Essential Graphics panel can build a text bubble: a shape layer, a text layer and some keyframes. It is worth comparing the two approaches honestly.
| Essential Graphics | MockClip export | |
|---|---|---|
| Look | Whatever you design | The iOS interface: banner, blur, icon, slide |
| Typing indicator, read receipts, keyboard | Build by hand | Built in |
| Changing copy | Edit text layers | Edit text, export again |
| Sounds | Find and sync separately | In the export |
| Stays editable in Premiere | Yes | No, it is a video clip |
| Time for a three-message scene | An hour or more | A few minutes |
Essential Graphics is the better tool when the bubble is a stylised graphic in your brand's look. When the shot needs to look like a real phone, an export from a tool that draws the real interface is faster and more convincing.
Delivering to a client
When the edit is client work, a few habits save rounds of revisions:
- Send the copy before you animate. Get the exact text of every message signed off in writing first. Wording is the change clients ask for most often.
- Keep the script with the project. Save the signed-off message text, sender names and delays in your project notes. Re-entering them in MockClip takes a couple of minutes, so a revision six weeks later is quick even on another machine.
- Hand over the overlay too. Some clients want the overlay as a separate file for their own team. The transparent MOV is the most useful version to deliver.
- Use a brand-free app and Studio. Client work needs MockClip's Studio plan, and the iMessage templates recreate Apple's interface, in which MockClip's licence grants no rights. For client deliverables, use a brand-free app such as Lock Screen Notifications, whose banners carry the client's own app name and colour and work exactly like the iMessage notification template: transparent background, chroma key and the same export formats.
Timing the scene to the edit
- Cut the overlay to the beat, not the other way round. Set the delay before each banner in MockClip so the first one lands on the moment you want, then make small adjustments by sliding the clip on the timeline.
- Leave reading time. A notification has to stay on screen long enough to be read twice. For a two-line preview, three seconds is a good minimum.
- Use the sound. MockClip exports include the notification sound. Keep it on its own audio track so you can lower it under dialogue or replace it.
- Match the light. A dark night scene with a bright white banner looks pasted on. Use the dark theme, or lower the clip's Opacity a touch.
- Export a few versions. Changing a line of text takes seconds in MockClip, so try two or three wordings and pick the best in the edit.
Which plan you need
The green screen route works on every plan, including the free one: MP4 and GIF exports at 720p and 1080p, with chroma key, are free with a small watermark, and Pro removes the watermark. Transparent MOV and WebM export, 60fps and hand-held scenes are part of Creator, which adds professional export and volume. On Free, Pro and Creator, your MockClip videos are for your own content, monetised posts on your own channels included; work for clients and paid ads need Studio, and the brand-free apps are the templates made for them. Real-app templates such as iMessage recreate designs owned by other companies, which MockClip is not affiliated with; the terms explain how you may use them. The pricing page has the details.
Write the banners, set Background to Transparent, export a ProRes 4444 MOV for your Premiere timeline.
Make an iMessage overlayRelated guides
Editing in another tool? The same files work in other editors: see text message animation in DaVinci Resolve and text message animation in CapCut. For everything about the alpha formats themselves, read transparent notification video export. And for a list of every format, frame rate and size MockClip exports, see the export settings guide.
Frequently Asked Questions
How do I add a text message to a video in Premiere Pro?
Make the text message animation as a video file first, then place it on a track above your footage. For notification banners, export a transparent MOV (ProRes 4444) so nothing needs keying. For a full chat screen, export an MP4 and scale it into the frame, or put it on a hand-held phone shot.
My transparent MOV shows a black background in Premiere. Why?
Check the clip's alpha interpretation: right-click it in the Project panel, choose Modify, then Interpret Footage, and make sure the alpha channel is not being ignored. Also check that the clip is on a track above your footage, not below it. If your setup still shows black, export the same animation with a green chroma-key background and use Ultra Key instead.
Should I use the transparent MOV or a green screen?
Use the transparent MOV when you can: the edges are clean and there is no key to tune. Use the green screen version when your system cannot read the alpha, or when you want an MP4 for a lighter project. Both work for the iMessage notification and phone call notification templates.
Can I make an iMessage chat screen transparent too?
No. The chat templates draw a full app screen, so there is nothing behind them to make transparent. Export the chat as an MP4 (with or without the iPhone bezel) and scale it into your frame, or composite it onto real footage of a hand holding a phone with a hand-held scene.
Which MockClip plan do I need for the transparent export?
Transparent MOV and WebM export are part of the Creator and Studio plans. MP4 and GIF with a green chroma-key background are free on every plan, with a watermark unless you have Pro or a subscription.
Related Articles
Text Message Animation in DaVinci Resolve: The Fast Way
Add animated text messages and iPhone notifications to DaVinci Resolve without building bubbles in Fusion: transparent ProRes 4444, Delta Keyer, chat cutaways.
Text Message Animation in CapCut: Chat & Notification Guide
Add an animated iMessage chat or iPhone notification to a CapCut edit on desktop or mobile: overlays, chroma key, timing to the beat, exporting for TikTok ads.
Transparent Notification Video: MOV and WebM Alpha Export
Export iMessage and phone call notification videos with a real alpha channel as ProRes 4444 MOV or VP9 WebM. Drop them on any footage, no green screen to key.
Green Screen iPhone Notification Videos (Chroma Key Ready)
Export iPhone text and call notifications on a pure green background — ready to chroma key over any footage in CapCut, Premiere, or DaVinci.
Phone Screen Replacement Without After Effects (2026 Guide)
Put your chat or app animation on real footage of a hand holding a phone without After Effects, Mocha or keyframed corner pins: hand-held scenes in the browser.