How to Make a Fake X Post Video (Free, Step by Step)
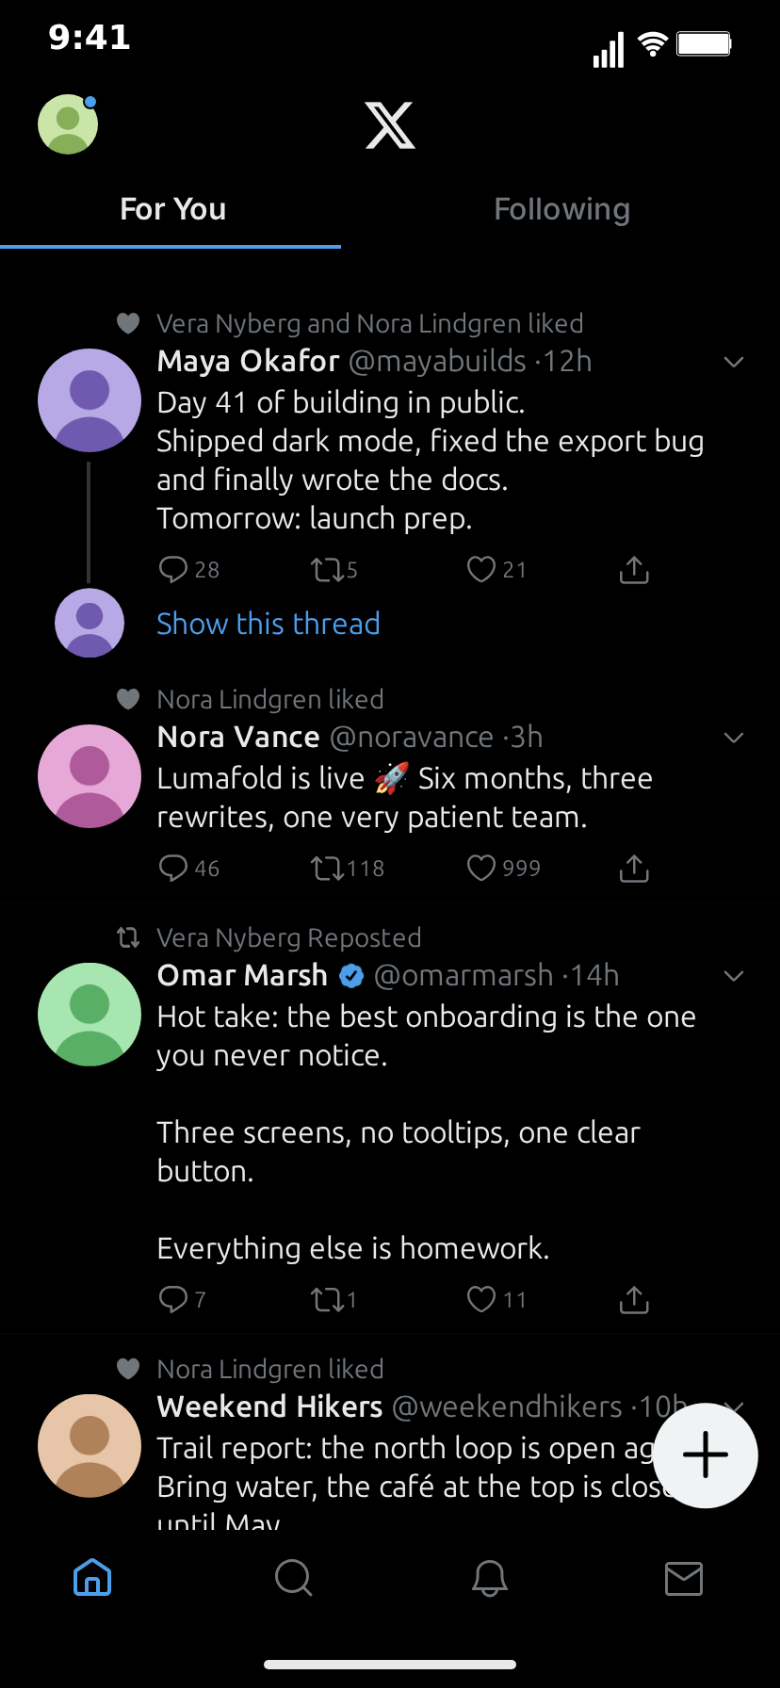
A fake X post video is a short clip that looks like someone recorded their phone while scrolling X (formerly Twitter): the feed moves, a post stops in the middle of the screen, the heart pops and the like count rolls up, a "new posts" pill drops in, and a tap opens the thread where replies keep arriving. This tutorial walks through making one with the free X template in MockClip, from the default feed to an exported MP4, with the timing and writing choices that make the result believable.
Everything happens in the browser. You do not need an X account, a video editor or design skills, and nothing is ever posted. MockClip is an independent tool and is not affiliated with X Corp.
What you will make
By the end you will have a vertical video, around 20 to 30 seconds long, that:
- opens on the home feed and flicks down to a launch post from a fictional account,
- likes the post, with the heart popping and the counter rolling past 999 to 1K,
- drops in a "3 new posts" pill that slides fresh posts onto the top of the feed,
- taps into the thread, where replies appear one by one,
- slides up the repost sheet over the thread,
- and ends on the compose screen, then back on home with the new post at the top.
You can stop at any step: a clip that only scrolls and likes one post is a perfectly good video.
Step 1: Open the X template
Go to the X editor. It opens on a ready-made feed with fictional people. Press Play once before you change anything; seeing the default flow tells you what each control does.
The editor has two tabs. Describe it writes the posts, the script and the screens from one sentence; it needs a Google or GitHub sign-in. Manual editor shows every field and needs no account. This tutorial uses the Manual editor, but you can start with Describe it and switch over to adjust the result.
Step 2: Pick the theme and sound
At the top of the editor, choose Light or Dark. Dark is the black Lights out theme, which many people use at night and which makes photos pop; light reads as daytime and as a brand-friendly white background.
Sound Effects adds short sounds for likes, new posts and posting. Turn them on if the export is the final video; turn them off if you plan to put voiceover and music over it in another editor.
Step 3: Write the posts
The Posts section holds the home timeline, top to bottom. For each post:
- Name and handle. "Nora Vance" and "@noravance". Use invented people and invented brands, never real accounts.
- Verified badge. Tick it for the blue badge next to the name.
- Time. "2m", "1h", "3h". The newest post on top gets the smallest number.
- Avatar. Upload a picture in the editor, or keep the default.
- Text. Hashtags, mentions and links are coloured in the accent colour automatically.
- Media. Optionally upload a photo, or set the post up as a video thumbnail with a play button and a length badge. The thumbnail is a still frame; the video does not play.
- Counts. The starting reply, repost and like numbers.
Four or five posts are enough for most clips. One of them is the post the video is about; the others are context the feed scrolls past.
Step 4: Add context lines and a thread link
Two small details make a feed look lived in:
- Context line. A line above a post saying who liked it, who reposted it, or that it is pinned. "Theo Marsh reposted" above a launch post tells the viewer it is spreading.
- Show this thread. A link with a small avatar under a post. It signals that there is more to read, which sets up the move into the thread view later.
Use one or two of each. Every post carrying a context line looks staged.
Step 5: Script the home feed
The home feed has a script: a list of steps that run in order while the screen is shown. The profile screen has one too. Each step has a duration and a Wait before (s), so you control both how long a move takes and how long the feed sits still before it.
The steps:
- Scroll. To a specific post, to the top, to the bottom, or by a distance in points. The Motion setting chooses smooth easing, for a slow read, or fling, for the quick thumb flick people actually use on a feed.
- Like or repost a post. The icon pops and the counter rolls to its new value. A post at 999 likes rolls over to 1K, formatted the way the app shows it.
- New posts pill. A pill drops in at the top with your label, for example
{n} new posts, where{n}is filled in for you. The posts you wrote under New posts slide onto the top of the timeline. - Pause. Nothing moves. Use it after the moment the viewer must see.
A script for this tutorial's video:
- Wait 0.8 s, then fling-scroll to the launch post.
- Pause 0.6 s so the post can be read.
- Like the launch post. Its counter goes 999 → 1K.
- Pause 1 s.
- New posts pill, labelled
{n} new posts, with three pending posts.
Step 6: Open the thread
The Post screen is the thread view. The focused post is shown large, with its full timestamp line, such as "09:41 · 3/10/26 · Web App", and a stats row. The Replies section holds the replies already under it.
Under New replies, write the replies that should arrive during the video. Each "Reply appears" step in the post screen's script reveals the next one, so a thread can fill up in front of the viewer: a question, an answer, a joke, a late reply that changes the mood. A reply can also carry a "1 more reply" style link, which reads as "the conversation keeps going".
The post screen's script has the same scroll, like and repost steps as the home feed, so you can scroll down to a reply and like it, or watch a reply's repost count climb.
Step 7: Slide up the repost sheet
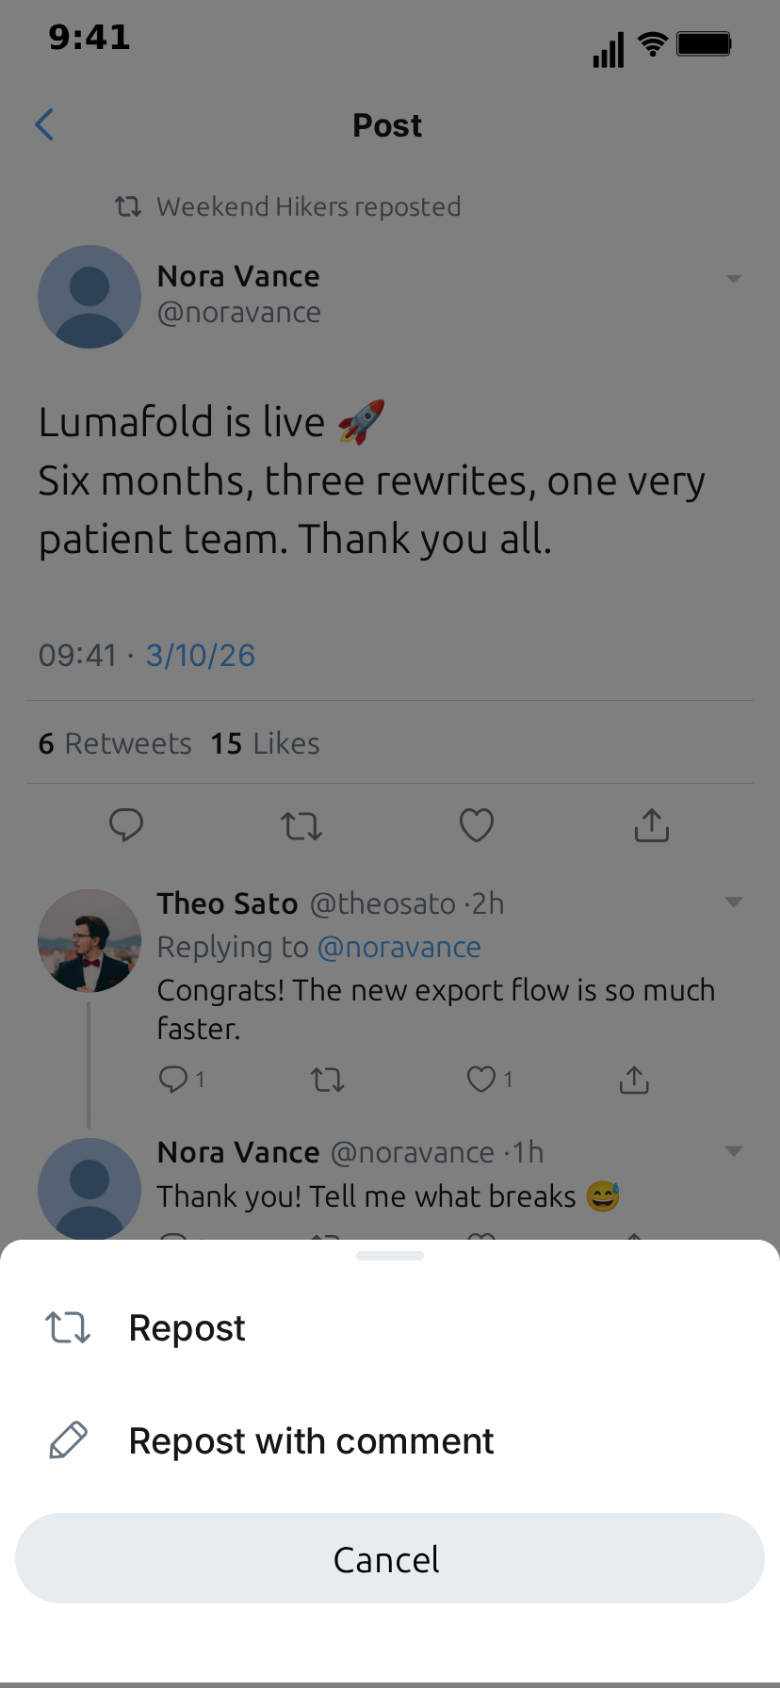
The repost sheet is the panel that slides up from the bottom when someone taps repost. In MockClip it is shown over the post screen: add a "Repost sheet" step in the video flow after the post. Give it a short hold, about a second and a half, then dismiss it back to the thread.
It is a small beat, but it changes the story from "someone is reading" to "someone is about to share this".
Step 8: Add the compose screen
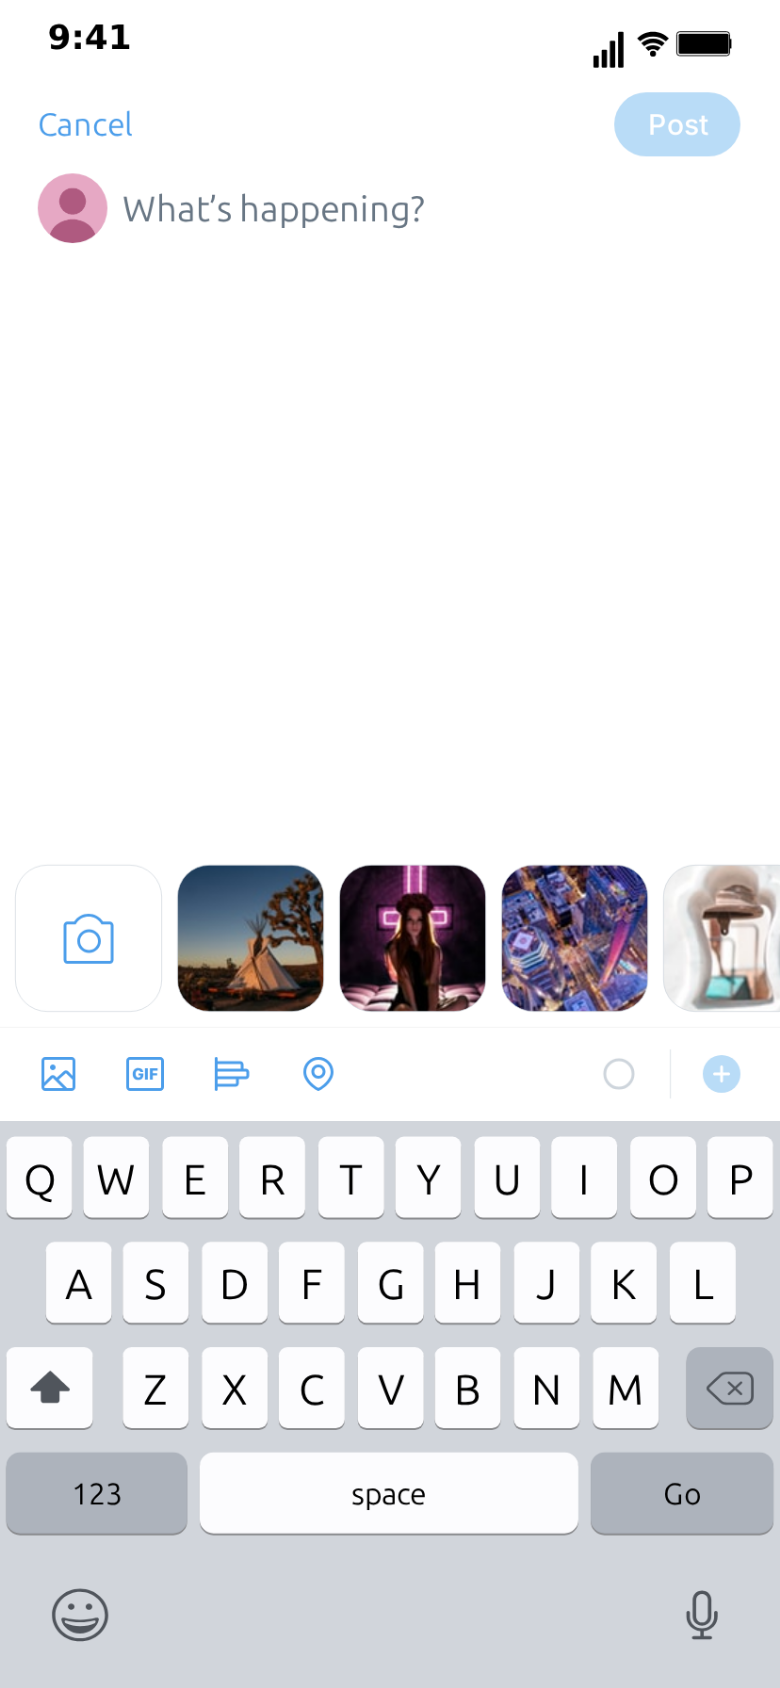
The Compose screen shows the new-post screen with the on-screen keyboard. Write the post that belongs to it in the editor. The text is not typed out letter by letter on this screen; compose is a beat that tells the viewer "they are posting". Once the video leaves the compose screen, the post you wrote sits at the top of the home feed, so the next shot of home shows it as published.
That makes a simple and effective ending: compose, a dismiss transition, and home with the new post on top.
Step 9: Use the menu and the other screens
The side menu is shown over home: add a "Menu" step in the video flow and it slides in from the left, pushing the feed aside. From the menu, the flow can move to a profile, which has its own feed and its own script, or to Lists.
The tab screens, Search, Notifications and Messages, and the New message screen have editable rows. Messages is the inbox list: names, handles, two-line previews and dates. These screens are good for a one-second establishing shot or a quick tab switch, for example from home to notifications and back.
Step 10: Set the video flow
The video flow is the order of screens. For each one you pick:
- The screen. Home, post, repost sheet, menu, profile, lists, compose, search, notifications, messages or new message.
- The transition into it. Push and pop for moving into and out of a thread, tab for switching tabs, fade for a soft cut, modal and dismiss for compose, sheet for the repost sheet.
- The hold. How long the screen stays. A screen with a script needs at least as long as its steps.
A touch indicator shows where the finger taps before each move: on the post before a push, on the repost icon before the sheet. Turn it off if you prefer clean cuts.
The flow for this tutorial: home (with the script from step 5) → push → post (two "Reply appears" steps) → sheet → repost sheet → dismiss → post → pop → home → modal → compose → dismiss → home.
Step 11: Preview and export
Press Play and watch the whole clip once at full length. Check that every post can be read in the time it stays still, that the like lands on a post that is on screen, and that the new posts pill is not hidden behind a caption you plan to add later.
Then choose the export:
- Format. MP4 for platforms, GIF for chats, docs and slides.
- Resolution. 720p or Full HD.
- Frame rate. 15 to 60 fps. 30 is a safe default; 60 makes fling scrolls look smoother; a GIF is lighter at 15 to 24.
- Bezel. With the iPhone bezel for a "this is a phone" look, or without, so the feed fills the frame like a real recording.
- Shape. Vertical for TikTok, Reels and Shorts, or 1:1 square for feeds.
The render happens in your browser. Free exports carry a small watermark; Pro removes it. The export settings guide goes deeper into frame rates and shapes, and the square export guide covers 1:1.
A complete example script
Here is the whole tutorial clip in one table. It runs about 26 seconds.
| # | Screen | Transition in | What happens |
|---|---|---|---|
| 1 | Home | Start | Fling to the Lumafold launch post, pause, like it (999 → 1K), "3 new posts" pill |
| 2 | Post | Push | Focused post with "09:41 · 3/10/26 · Web App", two replies appear one by one |
| 3 | Repost sheet | Sheet | Holds 1.5 s |
| 4 | Post | Dismiss | Short hold on the thread |
| 5 | Home | Pop | Short hold on the feed |
| 6 | Compose | Modal | Keyboard up, Nora's post "we just shipped it" |
| 7 | Home | Dismiss | Nora's post at the top of the feed |
Notice what each row does. Row 1 is the hook and the proof that the post is taking off. Row 2 shows people reacting, one reply at a time. Row 3 shows the urge to share. Rows 6 and 7 turn the viewer's character into a participant.
Making variations quickly
Once one clip works, the next one takes minutes:
- Swap the post. Change the text and the photo of the main post; the script still scrolls to it and likes it.
- Change the numbers. Start the counter at 98 instead of 999 for a quieter story.
- Flip the theme. Export light and Lights out and see which one your audience watches longer.
- Cut the flow. Drop compose for a shorter clip, or end on the repost sheet for a cliffhanger.
- Shorten for GIF. Keep only the like and the counter roll, export as a GIF for a slide or a chat.
Readability checklist
Before exporting, watch the preview at phone size and check:
- Every post the story depends on stays still long enough to read twice.
- The like happens while the post is in the middle of the screen, not half off the top.
- Replies arrive with at least a second between them.
- Names, handles, avatars and photos are invented or yours to use.
- In the vertical format, nothing important sits in the bottom fifth, where platform captions go.
Troubleshooting
The repost sheet never shows. It is shown over the post screen. Add a "Repost sheet" step to the video flow after a post screen.
The menu never shows. It is shown over home. Add a "Menu" step to the video flow after home.
The new posts do not appear. The pill needs a "New posts pill" step in the home script and at least one post under New posts.
A reply does not appear. Each "Reply appears" step reveals one reply from New replies, in order. Add one step per reply.
The counter shows 1K instead of 1,000. That is the app's own formatting, and the template copies it.
The compose text does not type out. By design: compose is a beat, and the post appears on home after it.
Using AI to build it
If you would rather not script it, switch to Describe it and write one sentence, such as "a fictional coffee app launches, the post hits 1K likes, and the replies ask about oat milk". The posts, the script and the screens are written for you, and you can adjust every field afterwards. The Describe it guide explains the approach.
From an AI assistant, MockClip's MCP server offers a create_x_feed tool. It works from Claude Desktop and other MCP clients, and returns a link that opens the finished animation in MockClip. The integrations page lists it.
Where to go next
The X feed animation generator overview lists every element of the template. For short-form strategy, the guide to X post videos for TikTok and Shorts covers hooks, pacing and framing. If the story belongs on a forum instead, see how to make a fake Reddit thread video or the free fake chat video maker guide for the chat templates.
Free to use. No sign-up. Browser-based.
Make a fake X post videoFrequently Asked Questions
How do I make a fake X post video?
Open MockClip's X template, write the posts with names, handles, times, text and counts, add steps to the home feed's script (scroll, like, repost, a new posts pill, pauses), choose which screens the video visits and how it moves between them, then export MP4 or GIF. It all runs in the browser.
Do I need an X account?
No. The template recreates the interface itself. There is no X login and nothing is posted to X. The Manual editor needs no account of any kind; only Describe it, the AI path, asks for a Google or GitHub sign-in.
How do I make the like counter go up?
Add a like step to the screen's script and pick the post. When the step runs, the heart pops and the counter rolls to its new value, including the rollover from 999 to 1K. Repost steps work the same way.
Is the post typed out on the compose screen?
No. The compose screen shows the keyboard and is a beat in the flow, not a typing animation. The post you write for it appears at the top of the home feed once the video leaves the compose screen.
Which export settings should I use?
For TikTok, Reels and Shorts, vertical MP4 in Full HD at 30 or 60 frames per second. For feeds, 1:1 square. For a chat or a slide, a short GIF at a lower frame rate. The iPhone bezel is optional in every format.
Can AI build the video for me?
Yes. Describe it writes the posts, the script and the screens from one sentence after a Google or GitHub sign-in, and you can then adjust every field in the Manual editor.
Can I make an X post video from Claude?
Yes. MockClip's MCP server has a create_x_feed tool that works from Claude Desktop and other MCP clients. It returns a link that opens the finished animation in MockClip, ready to export.
Related Articles
X Feed Animation Generator: Make Fake X Post Videos
Free X (formerly Twitter) feed animation generator. Animate posts, likes, reposts, threads and a new posts pill in the browser, then export MP4 or GIF.
X Post Videos for TikTok and Shorts: A Creator Guide
How to use an animated X post or thread as the hook of a TikTok, Reels or Shorts video: formats, pacing, 9:16 or 1:1 framing, and captions and voiceover after.
How to Make a Fake Reddit Thread Video (AITA, Storytime)
Complete 2026 guide to making fake Reddit thread videos for TikTok and YouTube — animated post, upvotes, comments, voiceover-ready MP4 export.
AI Fake Chat Video Generator: Describe It, Get the Clip
Type what the clip should be and MockClip's Describe it mode writes the messages and timing for WhatsApp, iMessage, ChatGPT, Tinder and more. Refine by second.
Fake Chat Video Maker Free: Create Text Conversation Videos
Free fake chat video maker for TikTok and Reels. Create realistic animated text conversations with iMessage, WhatsApp, and Instagram DM interfaces in minutes.