Messenger Video Call Green Screen Video: Chroma Key Guide
Every chat template on MockClip animates a conversation. The Messenger template also animates the screens around it, and three of those screens, the video call, the camera and the story, have a media area that renders as a chroma-key colour by default. Export the clip, key the green out in your editor, and your own footage appears inside a Messenger video call, a Messenger camera viewfinder or a Messenger story.
This guide covers what the green area is, how to set it up, the full workflow from MockClip to a keyed composite in the common editors, and the timing choices that make a fake video call read as real.
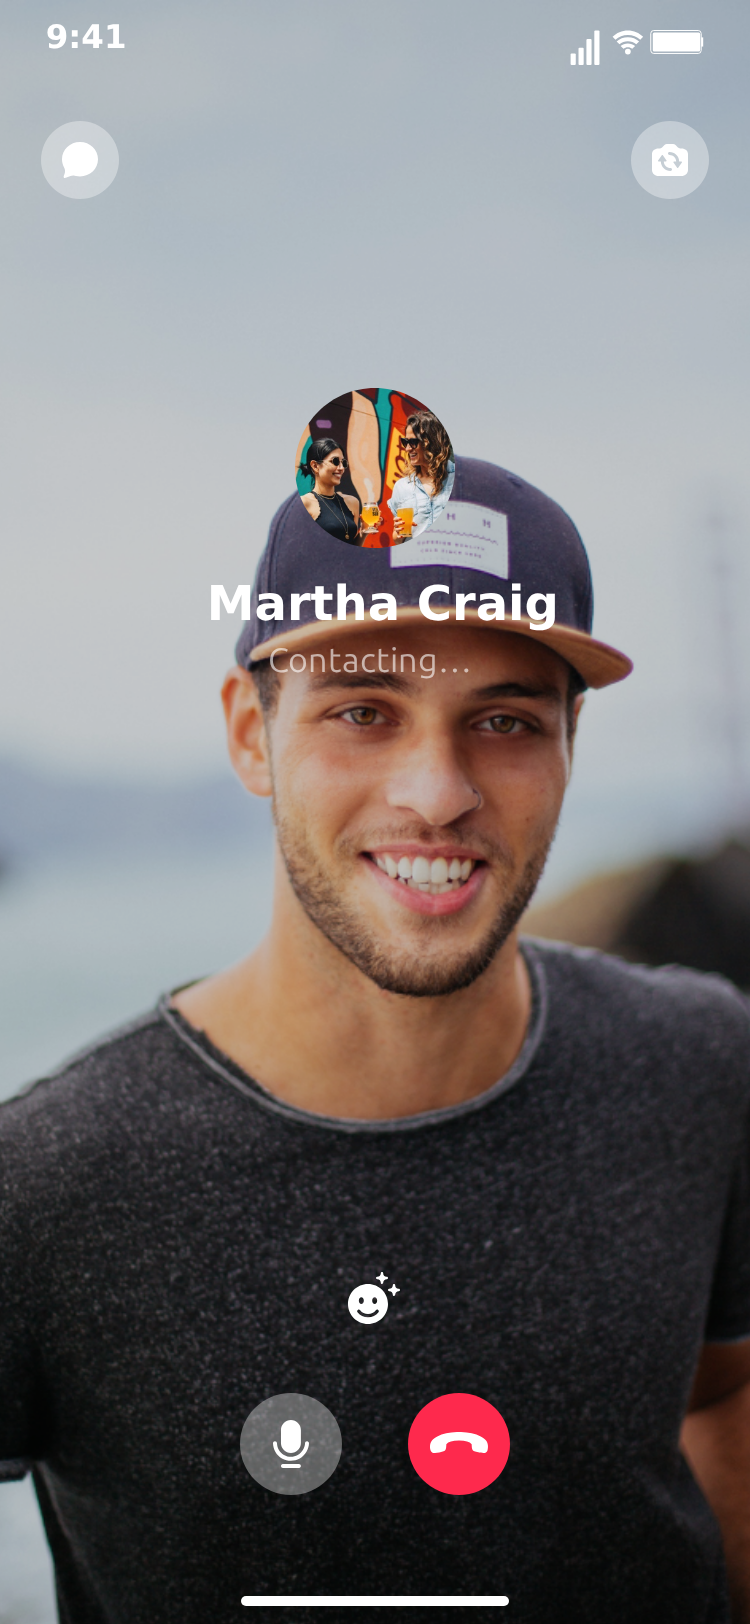
What the green area is and why it exists
A real Messenger video call shows the other person's camera feed full-screen, with your own small preview, the contact's name and the call timer drawn over it. MockClip does not play video inside the phone frame, so instead of leaving that area blank, the template fills it with a flat, saturated colour that video editors can remove in one click. That is a chroma key, the same technique as a green screen in a studio.
The default colour is pure green, #00FF00. It is the colour every editor's keyer expects, it does not appear in skin or most clothing, and it compresses cleanly in MP4. You can change it if your footage happens to be green: a blue key works just as well for a clip shot in a forest.
The same media area exists on two more screens:
- Camera. The viewfinder behind the capture button, flash and flip controls.
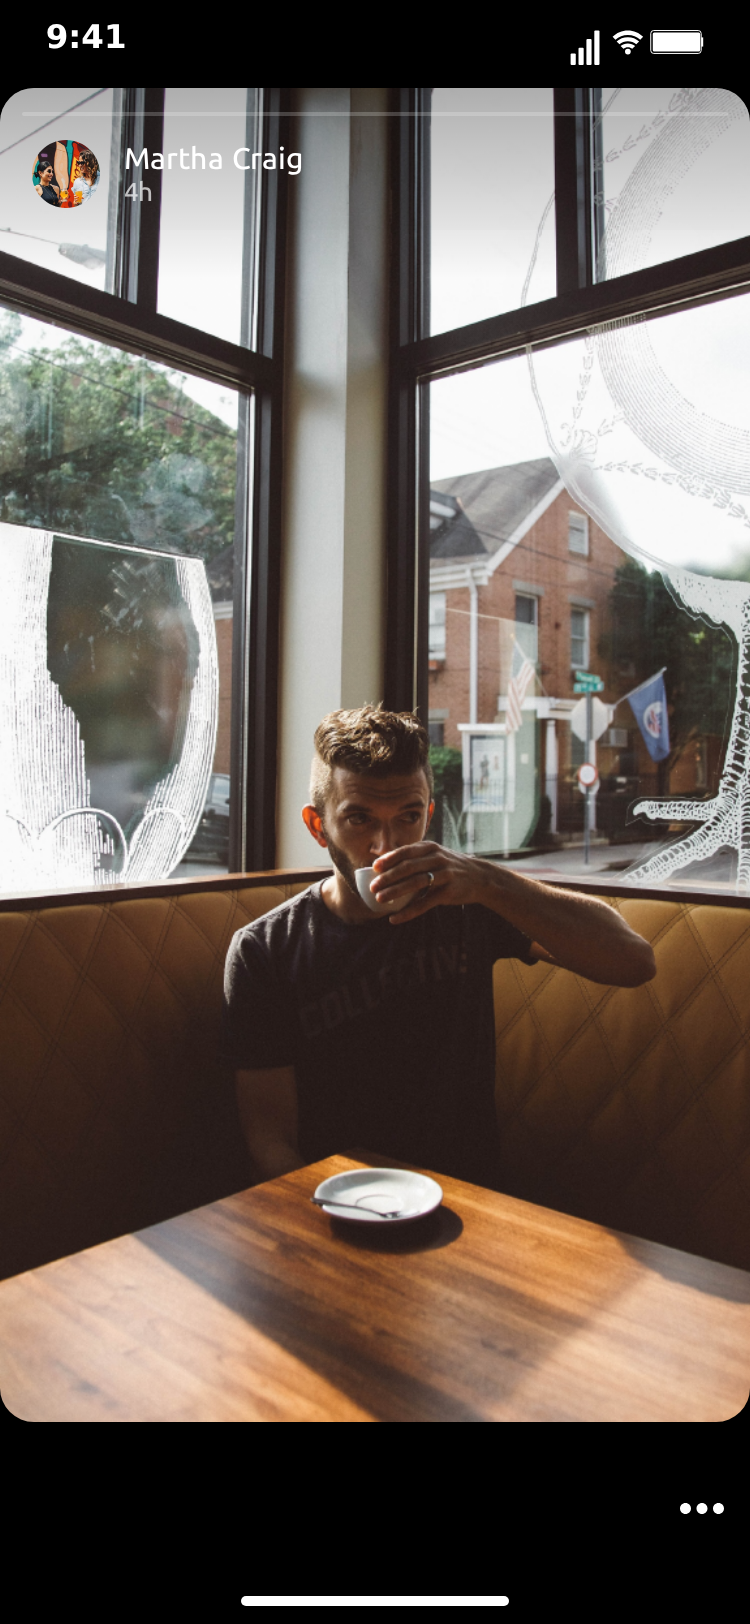
- Story. The full-height story media behind the name, the age and the progress bar.
Each of the three has its own media setting, so a flow can use a green key on the call and a still image on the story.
Chroma key or still image
The media setting has two modes.
- Chroma Key (Green Screen). The area renders as a flat colour, with a colour picker. Choose this when you will composite footage in an editor.
- Still Image. Upload an image and it is drawn cover-fitted into the area. Choose this when a single frame is enough and you want to skip the editor entirely: a photo of the "other person" on the call, a landscape for the story, a selfie for the viewfinder.
The rest of the screen draws over the media area in both modes, so the name, status, timer, controls and progress bar always sit on top.
Setting up the video call in MockClip
Open the Messenger template and build the conversation first; the conversation tutorial covers that in detail. Then:
- Click the Video call screen tab. The preview switches to the call screen.
- Set the media. Leave Chroma Key (Green Screen) selected and keep the default green unless your footage contains green. Or choose Still Image and upload a frame.
- Set the status and connection. The status text defaults to
Contacting…. Connects after (s) is when the status turns into the running timer; two seconds reads as a call that is answered quickly, six to eight seconds as a call that is left ringing. - Add the step to the flow. In the Video flow strip, add a Video call step after a Chat step with the
fadetransition, and give it a hold of as many seconds as the call should last. Add a Chat step after it withfadeto return, or end the clip on the call.
The default flow already does this: chats, push chat, fade video call for three seconds, fade chat, pop chats. Change the hold to match the length of the footage you plan to key in.
The contact's avatar and name come from the conversation, so the call shows the same person you were chatting with. The audio call screen uses the same status and timer but draws the contact's avatar blurred and dimmed as the background; it has no green area.
Setting up the camera and story screens
Camera is reached from the chats list with a modal transition and closed with dismiss. Its viewfinder is the media area. A green key here lets you composite a "what I am about to send" shot; a still image is the quicker option for a single frame.
Story is reached from the chats list with a fade and returns with a fade. Set the name, the age (4h), the avatar and Progress bar fills in (s), which is how long the story's progress bar takes to fill across the top. Hold the story step for at least that long so the bar completes. The story's media area keys the same way as the call.
Export settings for keying
Export as MP4 Video for keying; GIF's colour palette makes the key edges rough. Pick the resolution your editor project uses, 1080p for a vertical short. The green is a flat fill, so the encoder keeps it clean: no gradients, no noise, no motion blur inside the area, which is the best case a keyer can get.
Export the full flow, not just the call. Keying a call step that fades in from the conversation and fades out again gives you a finished sequence in one file; you only key the seconds where the green is on screen and the keyer ignores the rest.
Keying the green out in your editor
The steps are the same in every editor: put your footage on the track below the MockClip clip, apply the keyer to the MockClip clip, and the footage shows through where the green was.
CapCut
- Import the MockClip MP4 and your footage. Put the footage on the main track and the MockClip clip on an overlay track above it.
- Select the MockClip clip, open Cutout, then Chroma Key.
- Use the colour picker on the green area. Set Intensity to around 60 to 80 and Shadow low; the fill is flat so you will not need more.
- Scale and position the footage on the track below so it fills the call area. The call area is the whole screen minus the status bar and the bottom controls, so a vertical clip fills it naturally.
Premiere Pro
- Footage on V1, MockClip clip on V2.
- Apply Effects → Keying → Ultra Key to the MockClip clip.
- Pick the green with the eyedropper. Set Setting to Default; the flat fill keys clean without Aggressive.
- Under Matte Generation, raise Pedestal slightly if the rounded corners of the call area show a green fringe.
DaVinci Resolve
- Footage on V1, MockClip clip on V2.
- In the Color page, add a 3D Keyer or Chroma Keyer node on the MockClip clip, or use the 3D Keyer OpenFX in Edit.
- Pick the green. Enable Invert in the keyer output or use the alpha output to a layer node, depending on the workflow you use.
- Check the timer text and the small self-preview: they draw over the area and must stay opaque after the key.
Final Cut Pro and iMovie
Final Cut: connect the MockClip clip above the footage, add Effects → Keying → Keyer; it auto-detects the green. iMovie: put the MockClip clip above the footage, open the Video Overlay Settings and pick Green/Blue Screen.
After Effects
Footage below, MockClip clip above, Effect → Keying → Keylight. Pick the green and leave the defaults; a flat fill needs no screen matte cleanup.
Timing that makes the call feel real
A fake video call is a small scene inside a chat video. A few choices make it work.
- Fade, do not cut. The template fades between the conversation and the call, the way Messenger animates an outgoing call. Keep the fade.
- Let it ring. Two to three seconds of
Contacting…before the timer starts reads as a real connection. Zero seconds reads as a cut. - Match the hold to the footage. If your keyed footage is five seconds, hold the call step five seconds. A hold longer than the footage shows green at the end; shorter cuts the footage off.
- Put the reaction after the call. The most useful beat is the conversation resuming after the call ends: a second Chat step with
fadepicks the conversation up where it stopped. - Use the story as a prologue, not an epilogue. A story the character watches before messaging works; a story after the punchline is dead time.
Ideas that use the green screen
- The reaction call. Chats, push chat, three messages, fade video call with your own reaction footage keyed in, fade chat, the last message.
- "Look at this." A message with a photo grid, then a fade to the camera with a keyed viewfinder shot of the same thing moving.
- Story, then DM. Fade to a story with your footage keyed in, fade back to chats, push into the conversation, "saw your story".
- Product demo inside a call. For marketing: a support conversation, then a video call where the keyed footage is a screen recording of the product.
- Green screen for later. Export the call with the key, keep it as a reusable asset, and drop different footage behind it for a series.
Troubleshooting the key
- Green fringe at the rounded corners. Raise the keyer's choke or pedestal one notch. The call area has rounded corners in the design and the anti-aliased edge pixels are half green.
- The timer or the self-preview disappears. Your keyer is too aggressive and is eating white or light pixels. Lower the intensity; the fill is pure green and needs a narrow key.
- Footage looks squashed. The call area is taller than 16:9. Scale your footage to fill the height and let the sides crop, or shoot vertical.
- The green is not green. Check the media setting on that screen; the story, camera and video call each have their own. Also check you exported MP4, not GIF.
- Green shows at the end of the step. The hold is longer than the footage. Shorten the hold or extend the footage.
Doing it without an editor
If keying is more than the clip deserves, switch the media setting to Still Image and upload a frame. The call shows the frame full-screen with the name, status and timer over it, the story shows it behind the progress bar, the camera shows it in the viewfinder. It is not moving footage, but for a three-second call step in a chat video it is usually enough, and the export is finished the moment it downloads.
Generating the call from Claude or ChatGPT
MockClip's MCP server exposes create_facebook_messenger_conversation. Pass the conversation, a videoCall object with media: { kind: "chroma" } (or { kind: "chroma", chromaColor: "#0000FF" } for blue, or { kind: "image", imageUrl: "…" } for a still), a connectAfterMs, and a flow such as chats, chat with push, videoCall with fade and a holdMs, chat with fade, chats with pop. The tool returns a link that opens the clip in the editor. The story and camera objects take the same media shape. The connection guide covers the setup.
Chroma key by default. Free to use. Browser-based.
Make a Messenger video call clipRelated MockClip templates and guides
- Messenger chat maker — the template with the video call, camera and story screens
- Phone call maker — the standalone incoming call template
- Messenger chat animation generator — the overview of everything the Messenger template animates
- How to make a fake Messenger conversation video — the conversation tutorial this guide builds on
- Green screen iPhone notification video — the chroma-key workflow for the notification templates
- How to make a fake phone call video — the incoming-call template guide
- Fake phone call notification video — call notifications over your own footage
- Pricing — Pro tier for watermark-free exports
Frequently Asked Questions
What is a Messenger video call green screen video?
It is a clip of the Messenger video call screen in which the area where the other person's camera feed would be is a flat green colour instead of a video. You export it, key out the green in your video editor, and place your own footage behind it, so the finished video shows your footage inside a Messenger call.
Which Messenger screens have the green area?
Three: the video call (the full-screen remote feed), the camera (the viewfinder) and the story (the story media). Each has a media setting that is either a chroma-key colour or a still image you upload. The audio call screen uses the contact's blurred avatar instead and has no green area.
Can I change the green to another colour?
Yes. The chroma key defaults to pure green (#00FF00). Pick any colour in the editor if your footage contains green, for example blue for a clip shot in a park.
Can I put a video in the media area directly instead of keying?
Not yet. The media area is a chroma-key colour or a still image. Keying is the current path for video; a still image is the no-editor path for a single frame.
Which editors can key the green out?
Any editor with a chroma key or green screen effect: CapCut (Chroma Key), Premiere Pro (Ultra Key), DaVinci Resolve (3D Keyer or Chroma Keyer), Final Cut Pro (Keyer), iMovie (Green/Blue Screen), After Effects (Keylight). The steps are the same in each.
Does the call timer run?
Yes. The video call screen shows a status such as Contacting… until the number of seconds you set in Connects after, then a running 00:01, 00:02 timer for the rest of the step.
Related Articles
Messenger Chat Animation Generator: Make Fake Chat Videos
Free Messenger chat animation generator. Animate the chats list, photo grids, read avatars, calls, camera and story screens. Export MP4 or GIF in the browser.
How to Make a Fake Messenger Conversation Video (2026)
Step-by-step guide to a realistic fake Messenger conversation video: the new-friend intro, photo grids, read avatars, the keyboard, sheets, calls and stories.
Green Screen iPhone Notification Videos (Chroma Key Ready)
Export iPhone text and call notifications on a pure green background — ready to chroma key over any footage in CapCut, Premiere, or DaVinci.
How to Make a Fake Phone Call Video for Social Media
Make a fake phone call video for TikTok, Reels, or Shorts in minutes. Customize caller name, ring duration, outcome, and export to 1080×1920 MP4 free.
How to Create a Fake Phone Call Notification Video
Make realistic incoming call notification videos for comedy skits and viral content. Free browser tool with animation and MP4 export.