How to Make a Fake Messenger Conversation Video (2026)
A fake Messenger conversation video is a clip that looks like a screen recording of the Facebook Messenger app but was built from a script: you decide the names, the messages, the pauses, who has read what and which screens the phone visits. This tutorial walks through building one from scratch in the MockClip Messenger template, from the first message to a finished MP4, with the details that make the result read as real.
If you only want the short version: open the template, write the messages, turn on the keyboard, keep the default flow and export. Everything below is about doing it well.
What you are building
Before touching the editor, decide what the video is. A fake Messenger conversation video usually falls into one of four shapes:
- A single conversation. The clip opens inside the chat and plays the exchange. Shortest to make, works for prank and reaction content.
- The app flow. The clip opens on the chats list, pushes into the conversation, and pops back. Feels like a real person picking up their phone.
- A conversation interrupted. The chat plays, then a call, a story or a sheet cuts in, and the chat resumes. This is the shape only the Messenger template can do, because every screen in the app is a step you can add.
- A screen tour. The clip walks through the tabs and screens with little or no conversation. Useful for product and tutorial content.
The steps below build shape 3, since it uses everything, and note where to stop for shapes 1 and 2.
Step 1: Open the template and set the contact
Go to the Messenger template. The page opens on the Describe it panel, where you can type the story and let the AI write the first draft; for this tutorial switch to the manual editor so every field is visible.
Fill in Contact Name and Contact Status. Messenger statuses are short and specific: Active now, Active 12m ago, Active yesterday. Add a Contact Avatar. The avatar does a lot of work in this template: it sits in the top bar, next to every incoming bubble, in the chats list row, in the story strip if you add the person there, and it is the read mark under your messages. A recognisable face makes the whole video hang together.
Step 2: Turn on the intro block
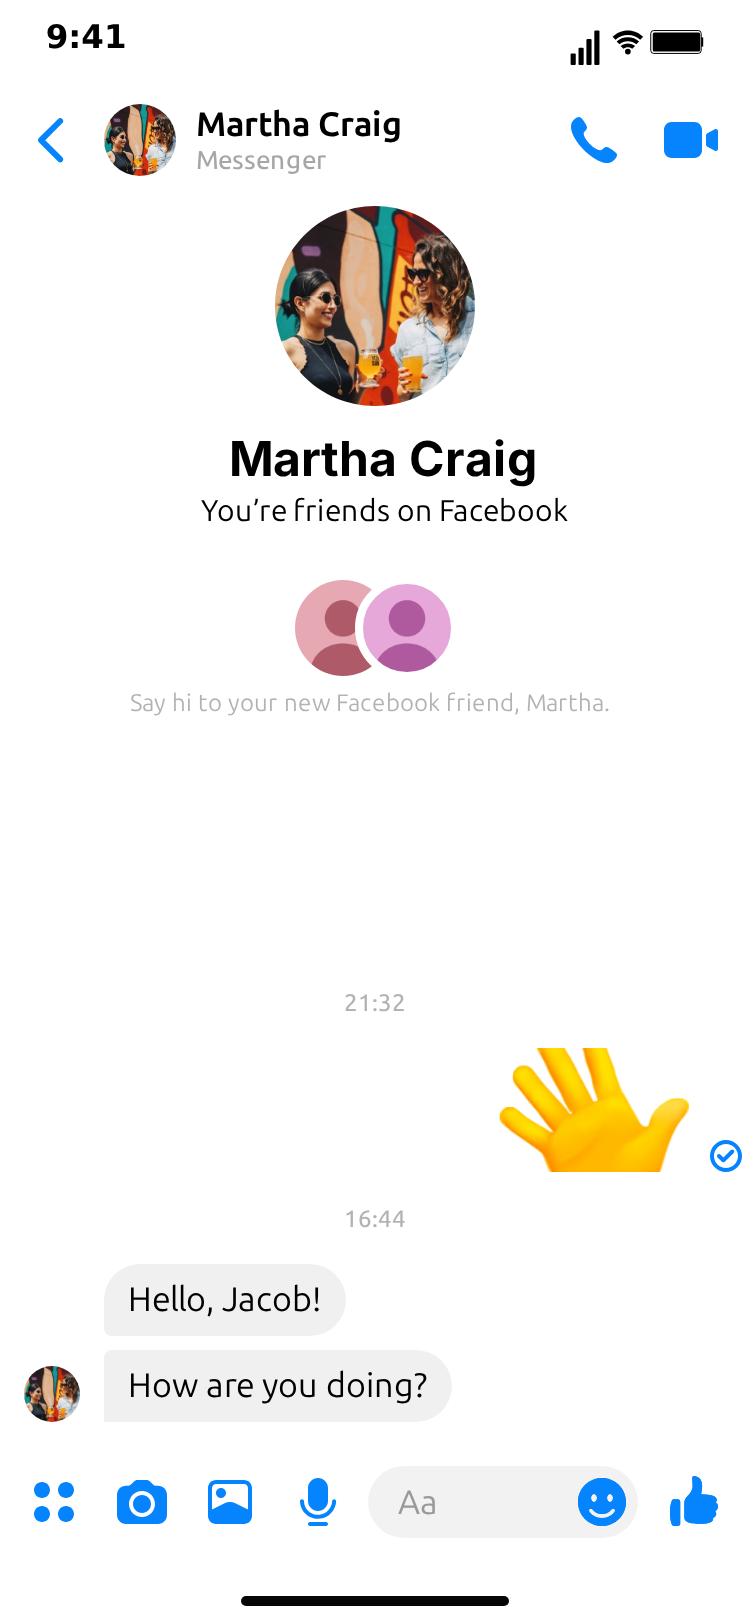
Open the Intro section and turn on Show the “new conversation” block above the first messages. This draws the block a brand new Messenger chat shows before the first message: the contact's large avatar, their name, a line such as You're friends on Facebook and a hint such as Say hi to your new friend. Both lines are editable.
The intro is the setup for a whole genre of Messenger video: the new friend, the mutual who finally messaged, the person from the event. As the conversation grows the block stays at the top and scrolls away, exactly as it does in the app. Leave it off for a chat between people who have been talking for years.
Step 3: Write the messages
In Messages, add one entry per line of dialogue and set the sender for each. A few rules that hold up:
- Six to twelve messages is the sweet spot for short-form. Fewer feels thin, more needs a longer video than most viewers will watch.
- Short bubbles. Messenger's bubbles are narrow. A line over 60 characters wraps into three rows and slows the clip.
- Alternate, but not strictly. Two or three messages in a row from one side reads as real. Perfect ping-pong reads as scripted.
- Write the last message first. Chat videos live on their last line. Know what it is, then write towards it.
Use Date line above on the first message of each group to draw a centred separator such as TODAY 9:41 AM. Messenger does not stamp every bubble, so separators are how you show time passing. Two groups separated by TODAY 11:52 PM tell the story of an evening without a single word of narration.
Step 4: Add photos
Any message can carry photos. One photo renders as a single rounded image in the bubble's place; two or more render as a grid of thumbnails, the way Messenger shows a batch. Upload the images you want, and keep them modest in number: a grid is a strong beat and one per clip is usually enough.
Photos also change the reply. A message that answers a photo grid ("is that your car??") reads differently from one that answers text, so plan the line after the grid with care.
Step 5: Set the timing
Every message has two timing controls, and outgoing messages have a third.
- Delay Before (s) is the pause after the previous message. Half a second to one second between messages in the same beat; two to four seconds before a message that should feel late.
- Typing Duration (s) on incoming messages controls how long the three-dot indicator shows before the bubble appears. One to two seconds for short lines. A long typing duration before a very short reply ("ok") is a classic comic beat.
- Show typing in input field on your own messages types the text into the input bar before it sends, at the Typing Speed (chars/sec) you set. Fifteen to eighteen characters per second reads as a normal thumb typist.
Step 6: Turn on the keyboard
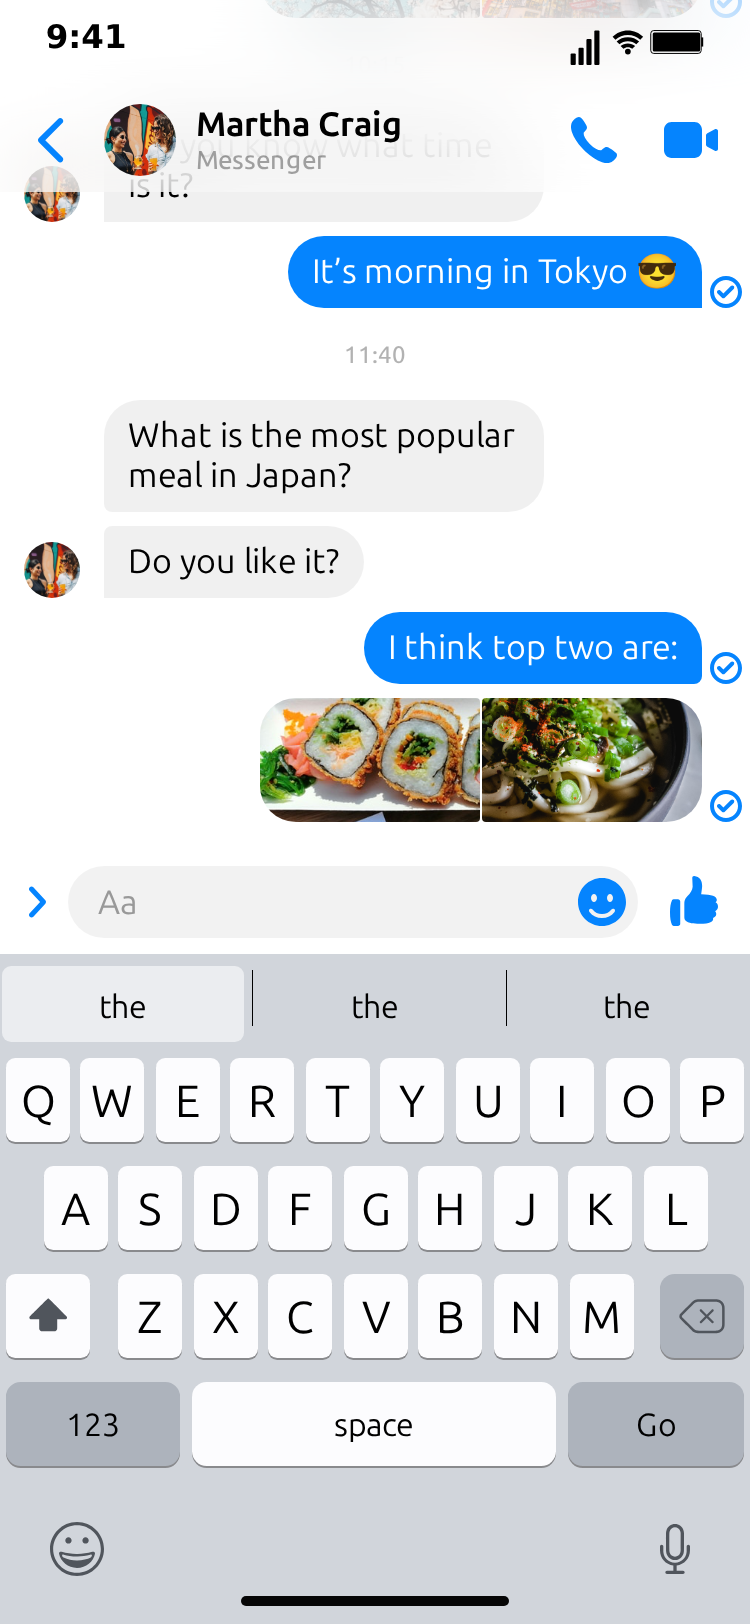
Open the keyboard toggle, Show the keyboard while typing. With it on, every one of your messages that types into the input field brings the iOS keyboard up: the conversation lifts, the input bar collapses to its compact form, the text types out, the message sends and the keyboard slides back down. With it off, the clip keeps the design's keyboard-down layout throughout and your messages simply appear after their delay.
The keyboard is drawn from the same Figma design as the rest of the screen, so it matches the theme. Use it when the act of typing is part of the story (hesitating over a reply, deleting and retyping is not supported, but a slow typing speed does the same job) and leave it off when the messages are the point and the mechanics are not.
Step 7: Set the read marks
Under Read marks, each outgoing message can show the sent check disc, then the contact's mini avatar once it has been read, each on its own delay after the message appears. This is the mechanic Messenger content turns on: the avatar that appears under your message is proof the other person saw it.
Two patterns worth knowing:
- Read at once, no reply. Short delay to sent, short delay to read, then a long Delay Before on the next message. The viewer sits with the avatar under an unanswered message.
- Read late. Sent immediately, read only after several seconds, then a reply. The gap is the other person deciding whether to answer.
For a single-conversation video (shape 1), stop here, preview and skip to the export step.
Step 8: Build the chats list
Click the Chat list tab above the editor. Add five or six rows with a Name, a preview, a time and, where it helps, Unread or Pinned. Vary the previews: a photo row, a "You: …" row, a short reply. Add a few people to the Stories strip and set Your avatar (top bar), which appears in the top left of the Chats screen.
The conversation from steps 1 to 7 already appears as a live row: it shows the last message and stays unread until the conversation has played in the flow, then updates. Put it near the top so the viewer's eye finds it.
Fill the People and Discover tabs too if the flow will visit them; each has editable rows. For a chats-list-plus-conversation video (shape 2), the default rows are enough.
Step 9: Design the flow
The Video flow strip at the bottom of the editor is the order of screens in the clip. The template ships with a flow that already does the interrupted-conversation shape:
- Chats, held 1.5 seconds.
- Chat, entered with a
push. The conversation plays here in full. - Video call, entered with a
fade, held 3 seconds. - Chat,
fadeback. - Chats,
pop, held 1.5 seconds.
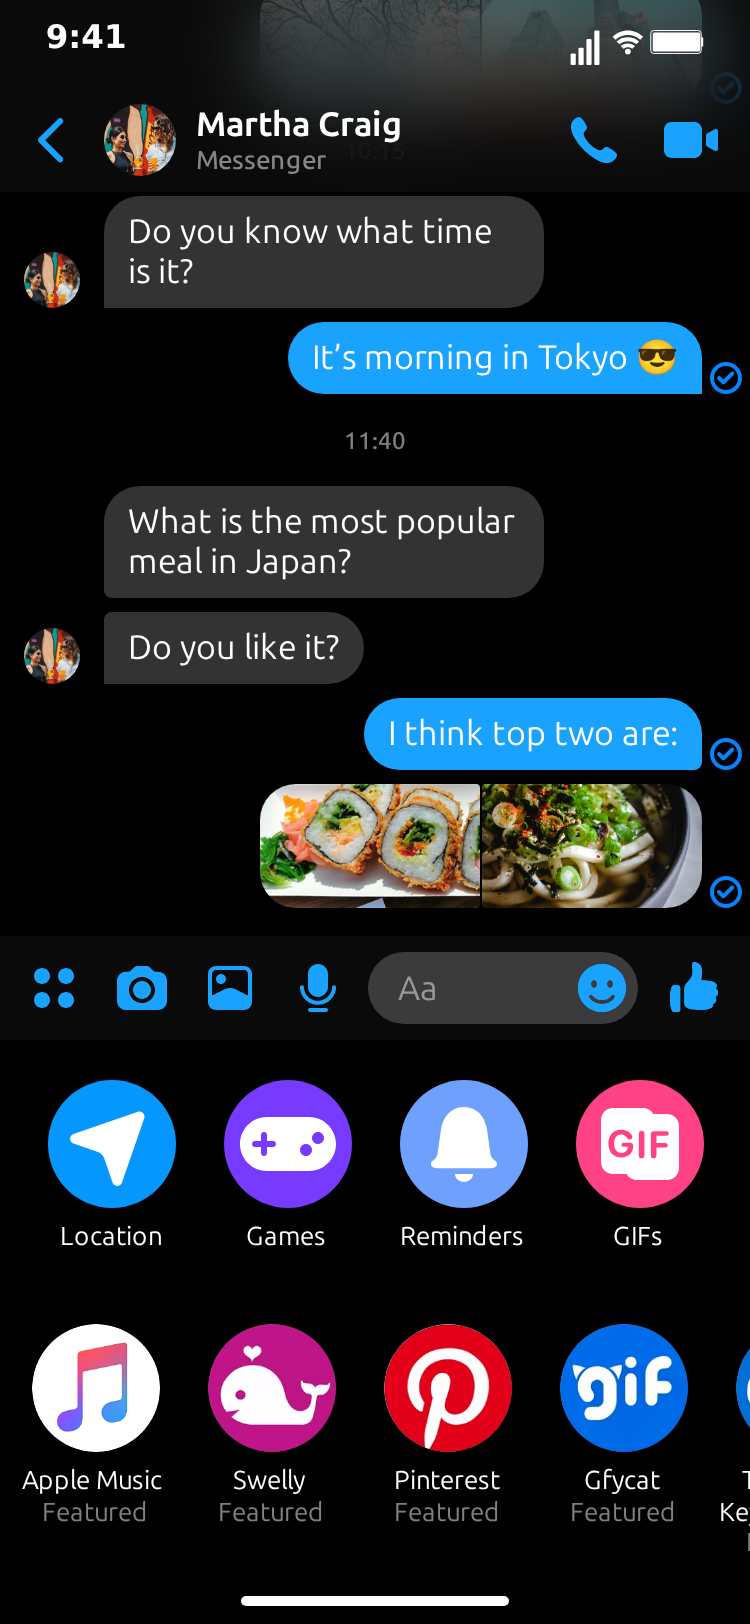
Each step's transition menu only offers moves the real app makes from that screen, so you cannot build an impossible flow by accident. From the conversation you can fade to the audio or video call, push to the profile, or open the Actions sheet or GIF picker with a sheet. From the chats list you can tab to People or Discover, modal to New message, Settings or Camera, fade to a Story, or swipe a row to show its actions. Every overlay and modal has a matching way back.
A few flow ideas that work:
- Story first. Chats → fade Story (hold 4 s) → fade Chats → push Chat. The character watches a story, then messages the person who posted it.
- Call interrupts. Chats → push Chat → fade Audio call (hold 5 s) → fade Chat → pop Chats. Set Connects after (s) on the call so "Contacting…" turns into a timer mid-step.
- Sheet beat. Chats → push Chat → sheet Actions → Chat → pop Chats. The sheet opens and closes as a pause before the last message.
The timeline screen (the Chat step) plays the conversation; a second visit to it resumes where the first left off, so you can split the conversation around an interruption.
Step 10: Set up the call, camera and story screens
If the flow visits them, give these screens a moment of attention.
- Audio call. Set Connects after (s): the status shows "Contacting…" until then and a
00:01,00:02timer afterwards. The background is the contact's avatar, blurred and dimmed, so it follows whatever avatar you set. - Video call. Same status and timer, plus a full-screen media area. It renders as a Chroma Key (Green Screen) colour by default so you can composite footage behind the call in your editor; change the colour if your footage contains green, or switch to Still Image and upload a frame. The green-screen guide walks through the compositing.
- Story. Set the name, the age (
4h), the avatar and Progress bar fills in (s). The media area works the same way as the video call. - Camera. The viewfinder is a media area with the capture controls drawn over it.
Step 11: Theme, sound and export
Toggle Light Theme if the story suits daytime. Choose the Sound Effects you want. Press play and watch the whole flow once, start to end, at full speed; most timing mistakes only show up when you stop scrubbing.
Then pick MP4 Video or GIF Animation and export. The render happens in your browser and the file downloads when it is done. Free exports carry a small watermark; the pricing page has the details on removing it.
Free to use. No sign-up. Browser-based.
Make your Messenger conversation videoMaking it look real: a checklist
Realism in a fake chat video is mostly restraint. Run through this list before exporting.
- Statuses match the story.
Active nowwhile they are replying;Active 2h agofor the message that gets left on read. - The avatar is consistent. One image for the top bar, bubbles, list row, story and read mark. The template does this for you as long as you set one avatar.
- Typing before every incoming message. Even a short one. Instant incoming messages are the most common tell.
- Not every message is read. Vary the read-avatar delays; leave one message on sent for a while.
- Date lines are sparse. One per group of messages, not one per bubble.
- One photo grid, one call, one sheet at most. Each is a beat; repeating a beat weakens it.
- The list holds long enough to read. 1.5 seconds minimum at the start.
- The end is the last line. Do not add screens after the message the video is about, unless the pop to the list is the punchline.
Turning one conversation into a series
Once the first video works, the template makes variants cheap:
- Swap the theme. Same script, light theme. Different audience segment, same effort.
- Change the flow, keep the chat. Version one opens on the list; version two opens on the story; version three cuts to a call. Three videos from one conversation.
- Reuse the cast. Keep the contact name, avatar and chats-list rows across videos so viewers recognise the "phone".
- Let the AI draft the next one. The Describe it panel takes a one-line story and writes messages, delays and read marks in the same format; refine it in the manual editor.
Generating the video from Claude or ChatGPT
MockClip's MCP server exposes create_facebook_messenger_conversation. Describe the contact, the messages and, optionally, the screens (chatList, stories, call, videoCall, story and the others) and a flow of steps, and the tool returns a link that opens the finished clip in the editor. Pass keyboard: "always" or "never" to force the keyboard either way, or leave it on auto. The connection guide covers the setup for each client.
Fair use and ethics
Fake conversation videos are entertainment, and audiences know it. The line to hold: never put a real, identifiable person's name and face on words they did not say, and never present a fabricated chat as evidence of a real event. MockClip is a mockup tool for stories, demos and tutorials. Use invented names, or your own.
Related MockClip templates and guides
- Messenger chat maker — the template used in this tutorial
- Telegram chat maker — the other multi-screen chat template
- WhatsApp chat maker — the closest alternative for international audiences
- iMessage conversation maker — the US-focused chat format
- Messenger chat animation generator — the overview of what the template can do
- Messenger video call green screen video — compositing footage into the call, camera and story screens
- How to make a fake Telegram conversation video — the Telegram version of this tutorial
- How to make a fake WhatsApp chat video — the WhatsApp version
- Fake chat video maker free — cross-platform chat video guide
- Pricing — Pro tier for watermark-free exports
Frequently Asked Questions
What is the easiest way to make a fake Messenger conversation video?
Use MockClip's Messenger template in the browser. Type the messages, set who sends each one, add photos and date lines where the story needs them, choose which screens the clip visits, and export an MP4. No install and no account for the free tier.
Will the video look like a real Messenger screen recording?
Yes. The template renders the Messenger interface from a Figma design of the app: the top bar with name, status and call icons, the blue gradient bubbles, the contact's avatar next to incoming messages and as the read mark, the story strip and tab bar on the chats list, the iOS keyboard, and the call, camera and story screens.
Can I show the 'You're friends on Facebook' intro?
Yes. The Intro section of the editor turns on the opening block with the contact's big avatar, the friends line and the hint text, the way a brand new Messenger chat looks before the first message.
Can the keyboard appear while a message is typed?
Yes. Turn on Show the keyboard while typing. Whenever one of your messages types into the input bar the keyboard slides up, the conversation lifts and the bar collapses; on send it slides back down.
Can the video include a call or a story?
Yes. Add a fade step to the Audio call or Video call screen from the conversation, or a fade to the Story screen from the chats list. The video call, camera and story screens have a media area that is a chroma-key colour or a still image.
Is it legal to make fake Messenger conversations?
Creating fictional chat videos for entertainment, education or marketing is fine. Do not impersonate real people, put words in a real person's mouth, or present a fabricated chat as evidence of something that happened. MockClip is a mockup tool, not a way to fake proof.
What is the maximum length of a Messenger video?
There is no hard cap in the editor. The clip length is the sum of the conversation and the hold time of every screen step. Most short-form videos land between 15 and 40 seconds; longer flows work for YouTube.
Related Articles
Messenger Chat Animation Generator: Make Fake Chat Videos
Free Messenger chat animation generator. Animate the chats list, photo grids, read avatars, calls, camera and story screens. Export MP4 or GIF in the browser.
Messenger Video Call Green Screen Video: Chroma Key Guide
Make a fake Messenger video call, camera or story clip with a green-screen media area, then key your own footage behind it in CapCut, Premiere or Resolve.
How to Make a Fake Telegram Conversation Video (2026)
Step-by-step guide to a realistic fake Telegram conversation video: reply quotes, image attachments, ✓✓ read marks, typing in the header and the peek preview.
How to Make a Fake WhatsApp Chat Video (2026 Guide)
Complete 2026 guide to creating realistic fake WhatsApp chat videos for TikTok, Reels, and Shorts — typing dots, blue ticks, MP4 export, no install required.
Fake Chat Video Maker Free: Create Text Conversation Videos
Free fake chat video maker for TikTok and Reels. Create realistic animated text conversations with iMessage, WhatsApp, and Instagram DM interfaces in minutes.