How to Make a Fake Grok Chat Video (Free, in Browser)
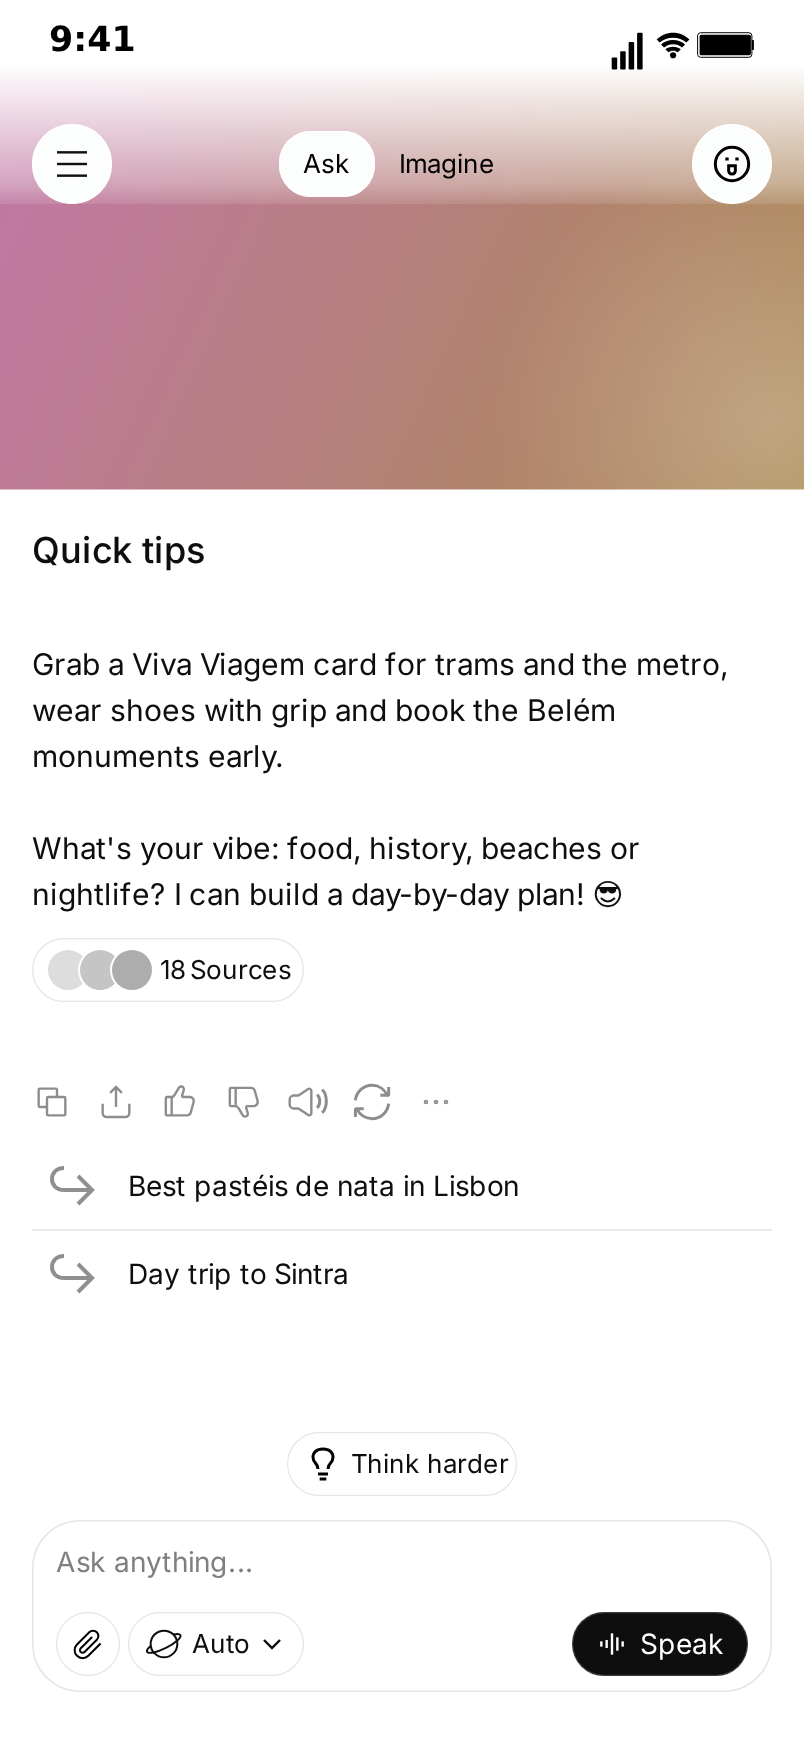
MockClip's Grok template turns a conversation you write into an animated phone screen that looks like the Grok app on an iPhone. Your question is typed into the "Ask anything..." bar with the keyboard up and search suggestions above it, three dots pulse while Grok "thinks", and the answer is revealed from top to bottom: paragraphs, headings, bullet points and, if you add one, a photo that sharpens as it appears. When the answer is done, a sources pill, the action row and follow-up questions fade in under it.
This guide walks through the whole process, from an empty editor to an exported MP4, and ends with a complete example script you can copy. It takes about ten minutes the first time and two or three once you know where everything is.
Every word in the clip is yours. Nothing is sent to xAI or to any AI model, and MockClip is not affiliated with xAI or X. Use the template for skits, explainers, tutorials and storytelling, and keep the content fictional or your own.
What you will make
A finished Grok clip plays like a short screen recording of someone using the app:
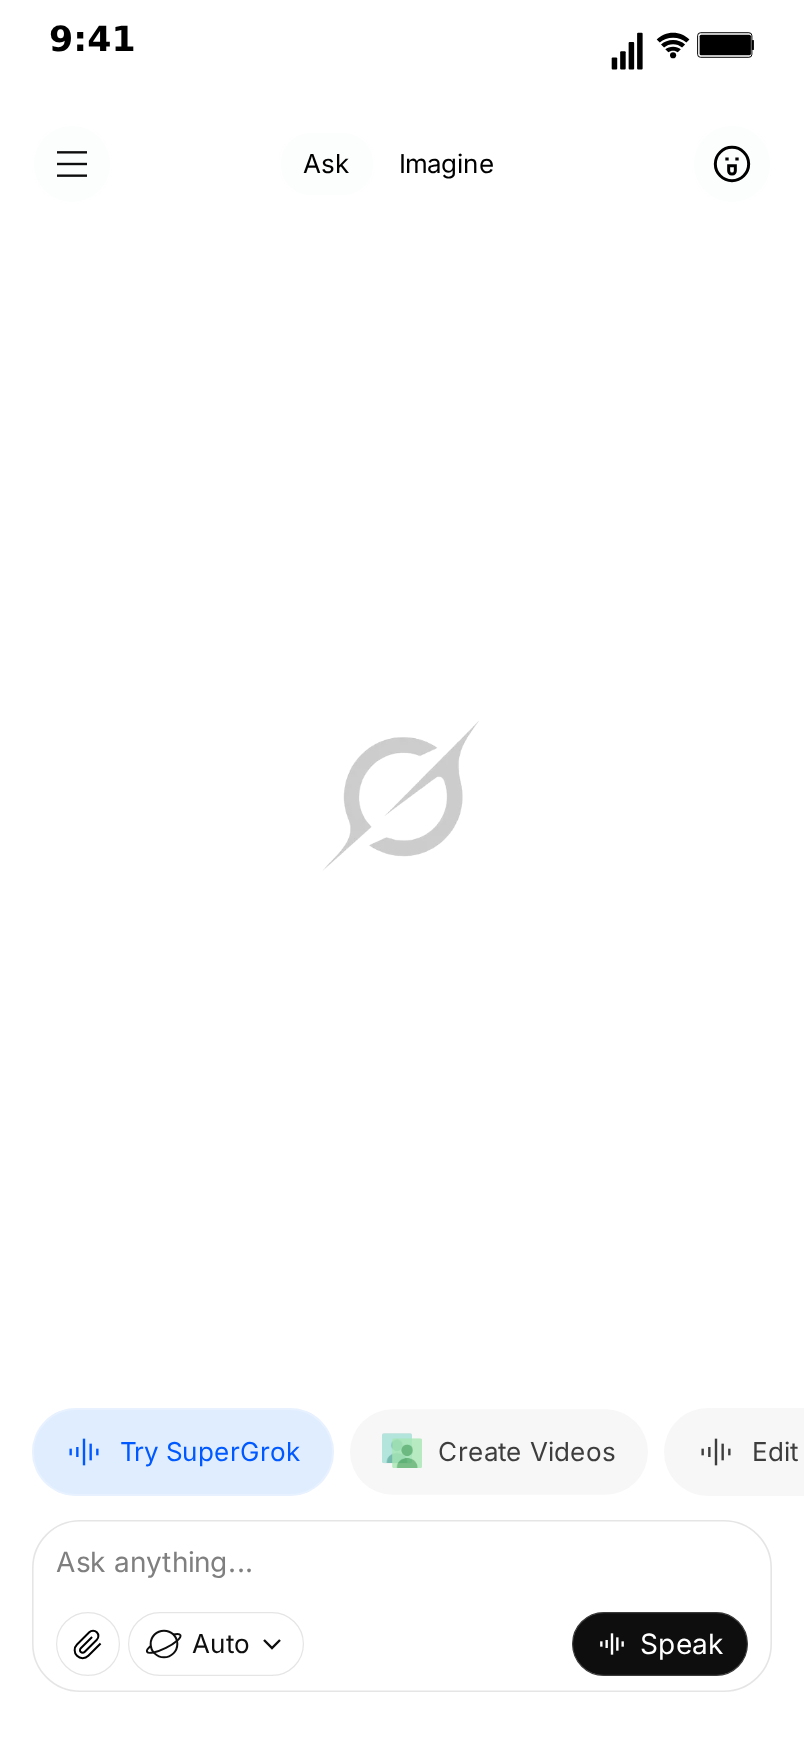
- The home screen. A new chat opens on Grok's home screen: the Grok logo in the middle, the "Ask" and "Imagine" switch at the top, a row of shortcut chips and the input bar at the bottom.
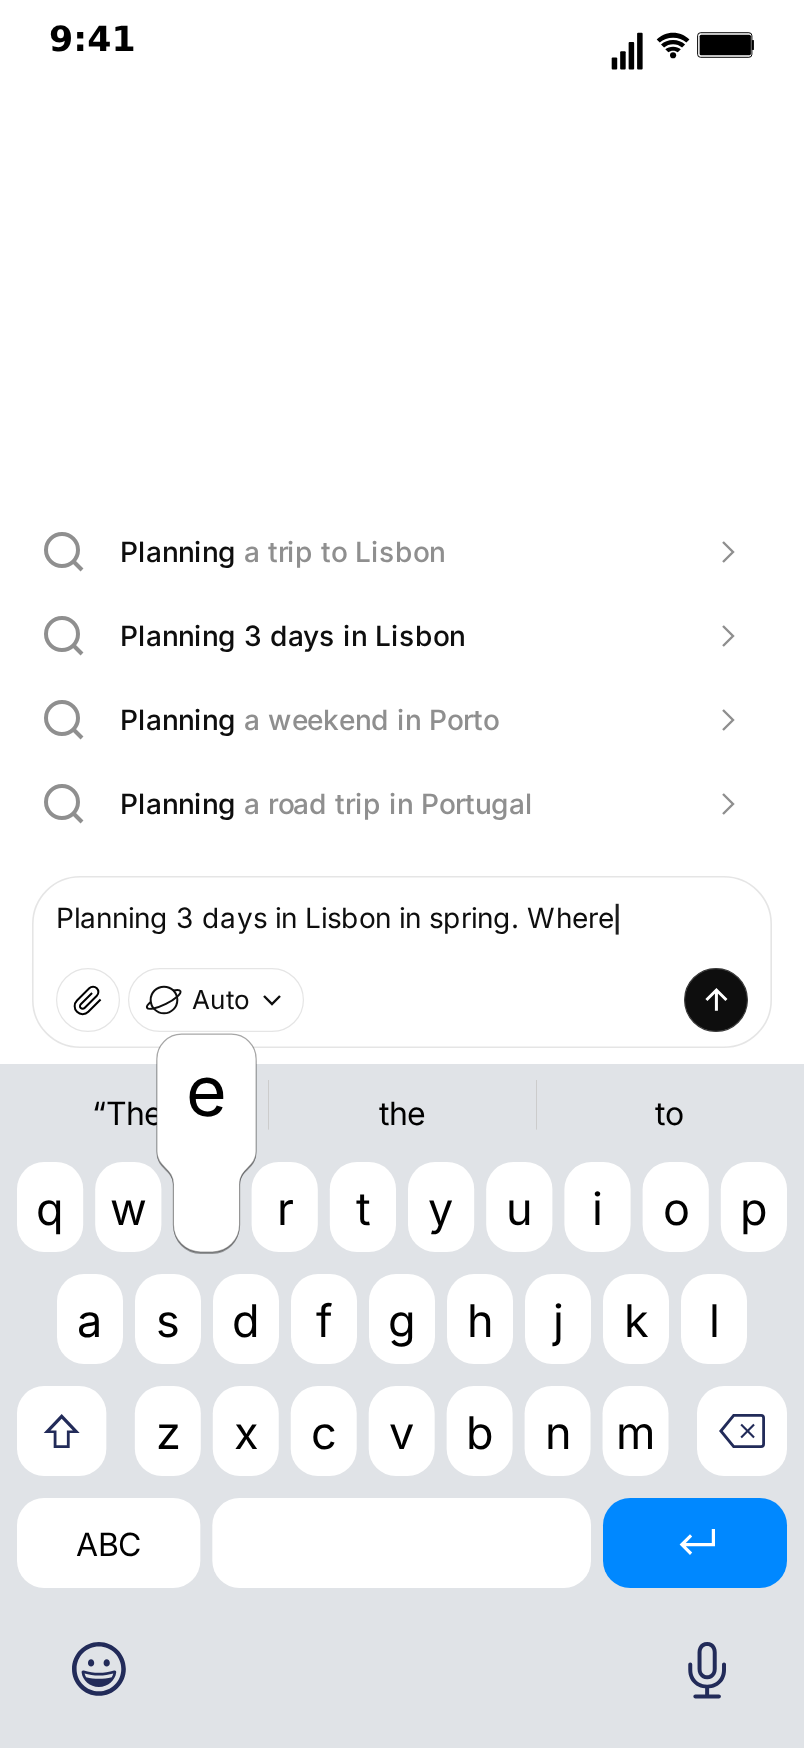
- The question. The keyboard slides up and your question is typed into the input bar letter by letter, each key lighting up as it is pressed. Above the bar, a list of search suggestions appears, and the round send button replaces the Speak button. When the question is sent, it lands as an outlined bubble on the right and the home screen gives way to the chat.
- The thinking dots. Three small dots pulse in a wave under your message for as long as you choose.
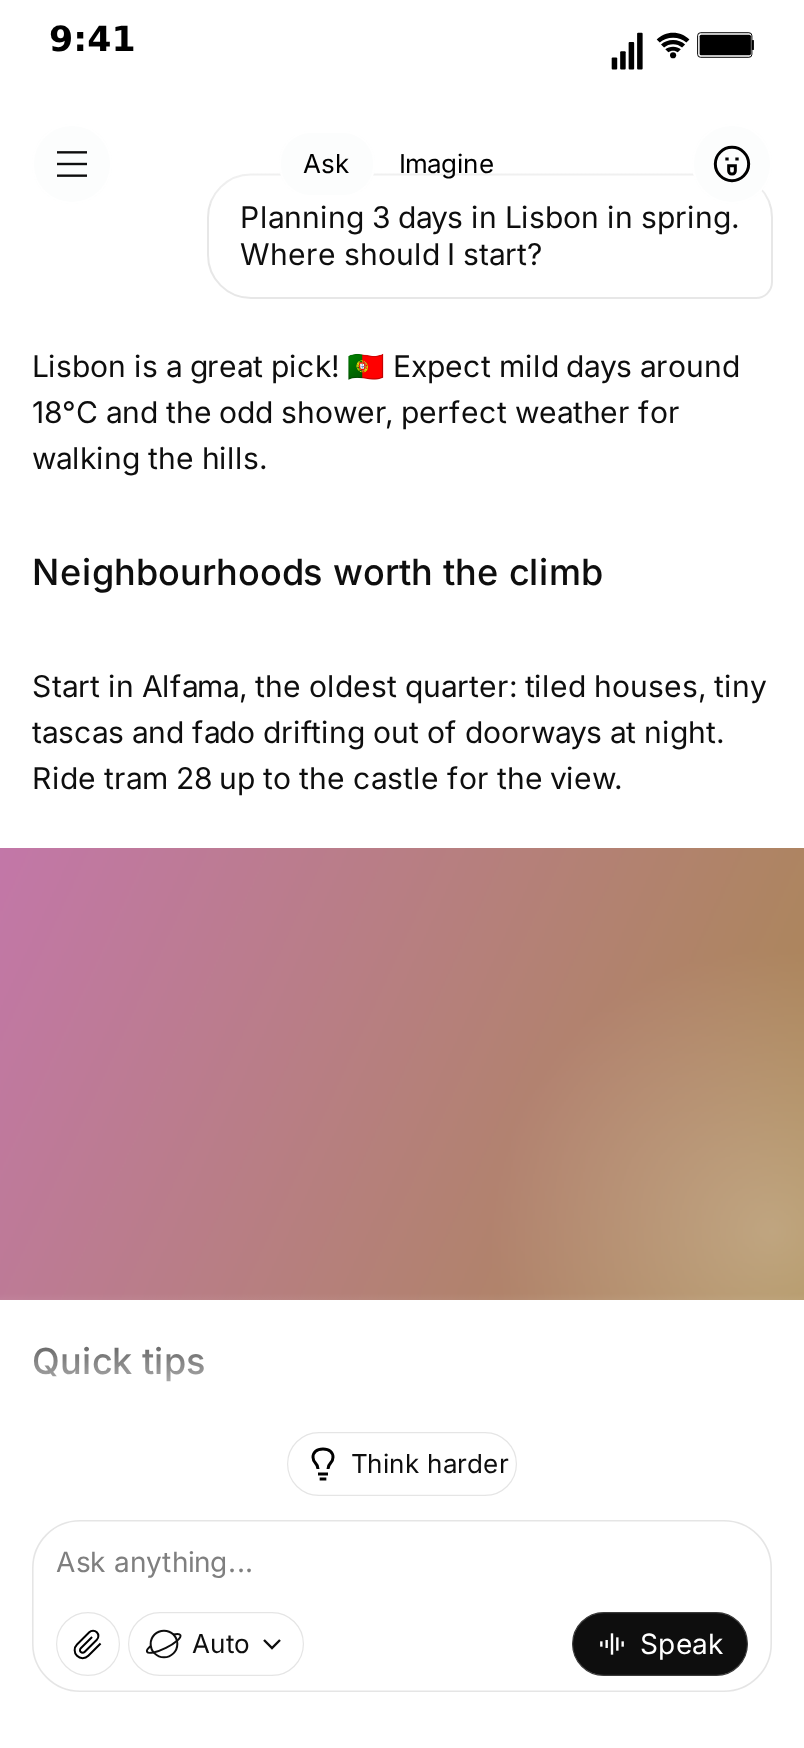
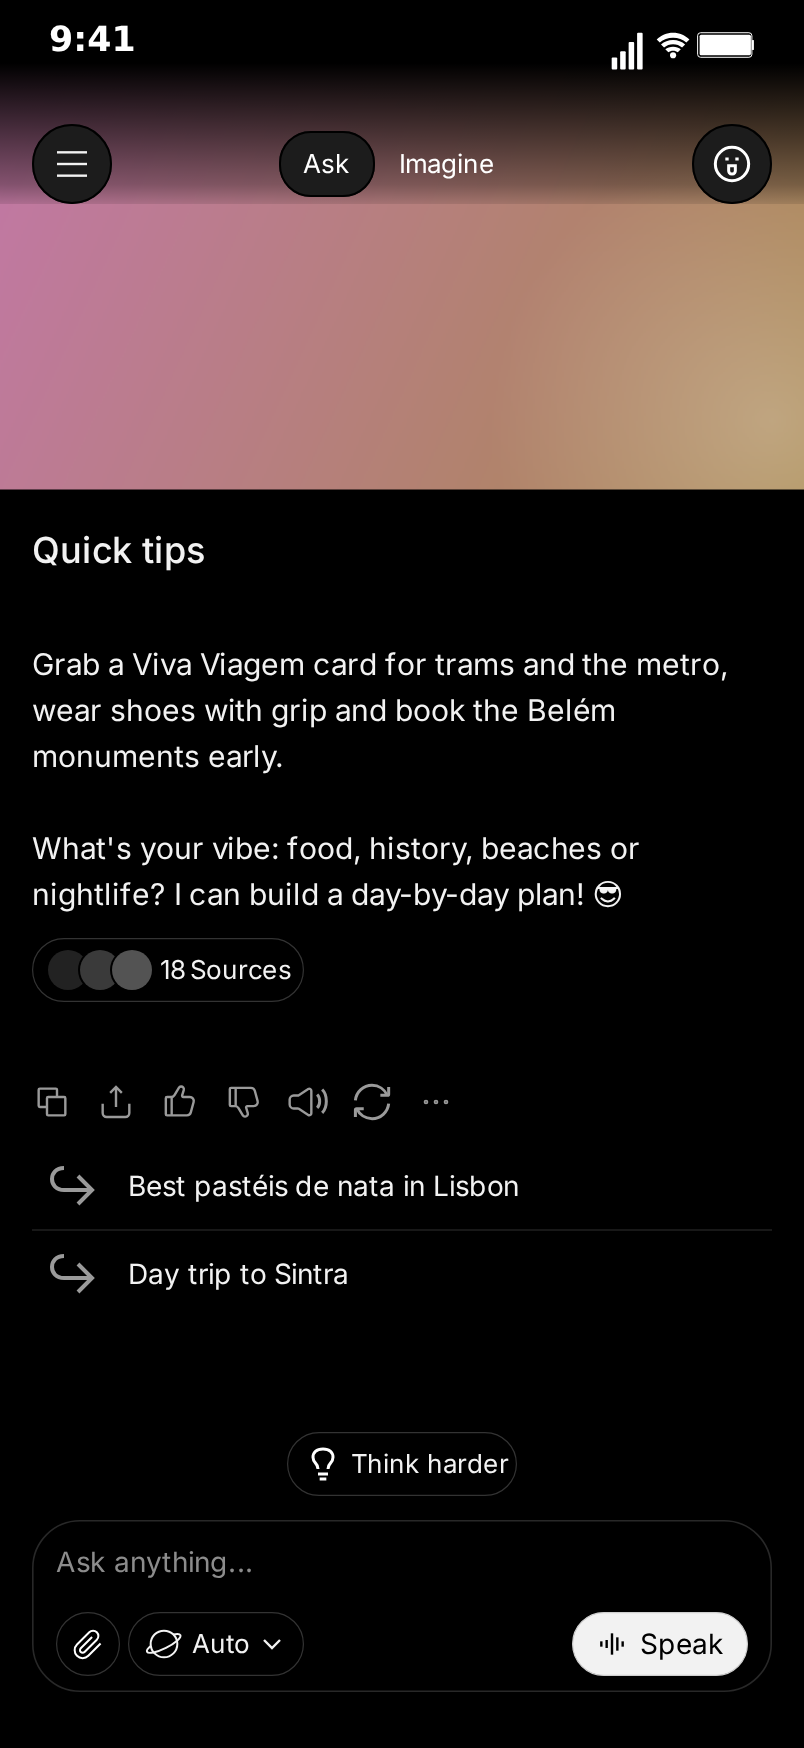
- The reveal. The answer appears from top to bottom as one block, with a soft edge sliding down over it, at a speed you set. Headings, bullet points and blank lines are kept. A photo in the reply starts blurred and dim and sharpens once the reveal reaches it. The chat scrolls so the newest line stays above the input bar.
- The footer. A "Sources" pill with round thumbnails and a count, the action row (copy, share, thumbs up, thumbs down, speaker, regenerate, more) and up to four follow-up questions fade in.
- The model picker. In the default clip, the model picker then fades in over a frosted screen and closes again.
You can drop or reorder any of these steps, add more questions and answers, switch to the dark theme and change every text on screen.
Step 1: Open the Grok template
Go to mockclip.com/app/grok. The editor opens with a default clip already loaded: a question about planning three days in Lisbon and a reply with two headings, a photo, a sources pill and two follow-up questions. Press Play under the preview to watch it once before you change anything. It is the quickest way to see what each setting does.
The editor sits next to the preview (or under it on a phone). At the top are the screen tabs (Chat, Home, Models) and the Video flow strip; under them the settings; under the settings the conversation itself. Everything you change shows up in the preview straight away.
You do not need an account to use the manual editor. If you want the AI to draft the conversation for you, see Using AI to write the conversation below.
Step 2: Choose the theme and the keyboard
The template opens in the light theme, which is how the design it is built from looks. A dark theme is one setting away: pick Dark under Theme and the background turns black, the bubbles, pills and buttons turn dark grey and the text turns white. The keyboard follows the theme too.
The Keyboard setting decides when the iOS keyboard is on screen:
- Up while you type (the default): the keyboard slides up when a question starts being typed and down again when it is sent.
- Always up: the keyboard stays up for the whole clip, and the input bar sits on top of it.
- Never: no keyboard. Typed questions still appear letter by letter in the input bar.
Under those are the sound effects switch (a typing sound while a question is typed, and a sound when it is sent and when the reply starts) and the watermark setting. Free exports carry a small MockClip watermark; paid plans remove it. See the pricing page for what each plan includes.
Step 3: Write your question
In the Conversation section, the first card is your message. The role selector at the top of the card says You. Type the question in the text box, as you would ask it in the app.
Under the text box are the timing controls for your turn:
- Wait (s): how long the clip pauses before this turn starts. The default is half a second.
- Typed on the keyboard: when ticked (the default), the question is typed into the input bar letter by letter with the keyboard up. Untick it and the question appears in the chat at once. On the first message, that also makes the home screen give way to the chat straight away.
- Chars/s: the typing speed, 14 characters per second by default. Lower it for a slower, more deliberate question; raise it for a quick one.
Short, casual questions read best in a video. Grok users type the way they talk, often without capitals or a question mark, so a slightly messy question looks more real than a polished one.
Step 4: Add the search suggestions
While your question is typed, Grok shows a few suggested searches above the input bar. The template draws them the same way: a magnifying glass, the suggestion and a chevron on each row, over the whole screen above the bar.
You write the suggestions yourself in the Search suggestions while typing box, one per line. The part of each suggestion that matches what has been typed so far is drawn darker, and the rest lighter, so as the question grows the matching part grows with it. A suggestion that starts with the same words as your question looks the most natural: for "Planning 3 days in Lisbon in spring", suggestions like "Planning a trip to Lisbon" or "Planning 3 days in Lisbon" work well.
Four suggestions fill the space the way the app does. Leave the box empty and no suggestions appear; the home screen simply stays on screen while you type.
Step 5: Write Grok's reply
Click + Grok to add a reply card, or edit the one that is already there. The role selector says Grok. Type the answer into the text box. A few simple rules decide how it is drawn:
- Blank lines are kept. Leave an empty line between paragraphs, the way Grok spaces its answers.
- Bullet points. A line that starts with
*or-is drawn as a bullet point with a hanging indent. - Headings. A line that starts with
##(or#/###) is drawn as a heading in a larger, heavier type, with more space above and below it. - The photo's place. A line that reads
[image]marks where the reply's photo goes (see the next step).
Code blocks, tables, bold text and coloured links are not drawn, so write around them: a short list instead of a table, plain words instead of bold.
There is no logo or name above Grok's replies, just as in the app. The answer starts right under your question.
Step 6: Add a photo, sources and follow-ups
Each reply card has three optional extras that make an answer look like a real Grok search result.
A photo. Use the Image file picker on the reply card to upload a picture from your computer. It is shown full width inside the reply where a line reads [image]; if there is no such line, it goes after the text, or before it if you pick Before the text. As the reveal reaches the photo, it shows blurred and slightly dim, then sharpens over Sharpen (s) seconds (0.8 by default). Set it to 0 for a photo that is sharp at once, or to 2 or 3 seconds for a slow, dramatic reveal.
Sources. Tick Sources and set the Count to add the "Sources" pill under the reply, with three overlapping round thumbnails and your number ("18 Sources"). It fades in with the action row when the answer is done.
Follow-up questions. The box under the reply card takes follow-up questions, one per line. They appear under the action row, each with Grok's curved arrow and a thin divider between them. Two or three short ones look best; the app rarely shows more.
The action row itself fades in under every finished reply unless you untick Action row on that card. For a reply that fails, type the failure text into Error and the reply shows that line instead of the answer.
Step 7: Set the thinking and reveal timing
Each reply card has its own timing:
- Wait (s): the pause before the reply starts, half a second by default.
- Thinking (s): how long the three dots pulse before the answer appears. The default is 1.2 seconds. A one-word question with a long pause is a good comic beat; a long, serious question with a short pause looks confident.
- Stream chars/s: how fast the answer is revealed, 100 characters per second by default. The reply always appears as one block from top to bottom, so this sets how long the soft edge takes to slide down over it.
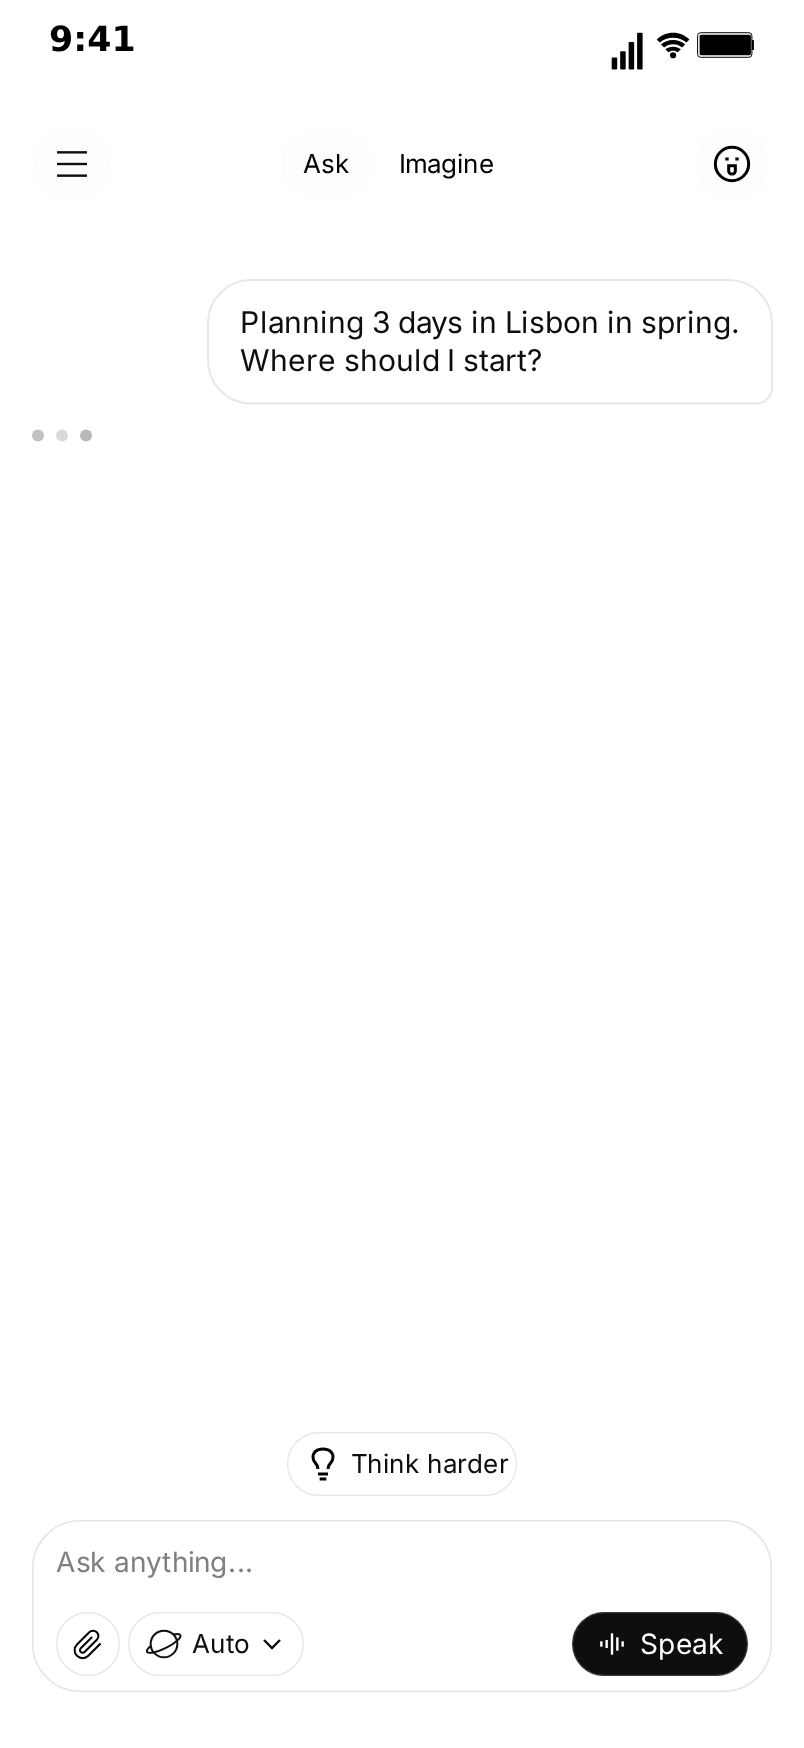
For a natural rhythm, keep the thinking time between one and two seconds and the reveal speed between 60 and 150 characters per second. A long answer at the default speed takes several seconds to appear, which is about how long a viewer needs to start reading it.
Step 8: Adjust the input bar and the home screen
Under the conversation are the Labels:
- Input bar hint: the grey placeholder in the empty input bar, "Ask anything..." by default.
- Pill above the input bar: the "Think harder" pill that floats above the input bar in the chat. Untick it to hide it. It always slides away when the keyboard comes up.
The Home tab edits the home screen the chat opens on. Its own input bar hint is there, and Show Tooltip adds the black "Tap here to speak with Grok" tip above the Speak button, as the app shows it to new users. It is off in the default clip.
Step 9: Arrange the video flow
The Video flow strip at the top of the editor lists the screens the clip walks through, in order. The default is the chat (which begins on the home screen), then the model picker, then the chat again.
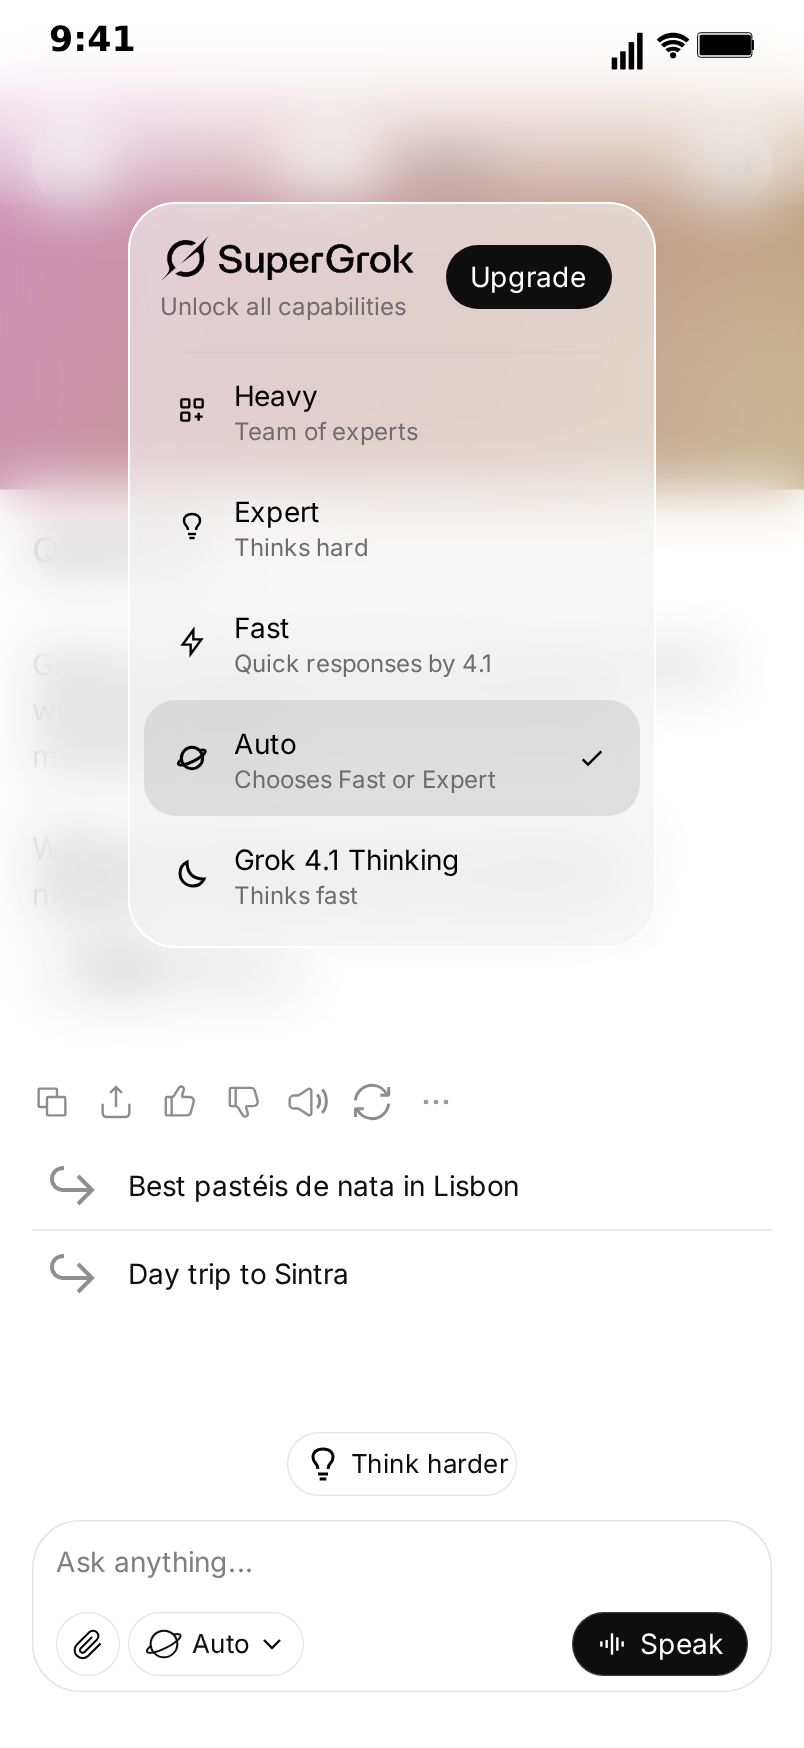
- The model picker fades in over a frosted, blurred copy of the screen, holds for the time you set and fades out again. Remove both of its steps to end the clip on the conversation.
- Hold sets how long each step stays on screen. The chat step plays the whole conversation, so its length follows your messages.
- Show taps draws a small touch indicator where the user taps before each move, such as the Auto button before the model picker opens. Untick it for a cleaner clip.
The screen tabs above the strip (Chat, Home, Models) only choose what the paused preview shows while you edit. They do not change the clip.
Step 10: Preview and export
Press Play under the preview to watch the clip from the start, and drag the timeline to check a single moment. When it looks right, open the export settings:
- Format: MP4 video or GIF animation.
- Resolution: 720p or Full HD.
- Frame rate: 15 to 30 fps, or 60 fps on the Creator plan.
- Frame: with or without the iPhone bezel, and the aspect ratio, including a 1:1 square crop.
The export is rendered in your browser and downloads when it is done. For TikTok, Reels and YouTube Shorts, export vertical 9:16 MP4 at 30 fps; for a GIF in a blog post or a chat, 15 fps keeps the file small.
A complete example script
Here is a short conversation that shows off every part of the template. Copy each turn into its own card.
You (typed): what should I see in Rome in two days?
Search suggestions, one per line:
what should I see in Rome
what should I eat in Rome
what should I pack for Rome
Grok (thinking 1.5 s):
Two days is enough for the classics! 🍝

## Day 1

The Colosseum and the Forum in the morning, then a slow lunch in Monti. End the day at the Trevi Fountain, after the crowds thin out.

[image]

## Day 2

The Vatican Museums early, then St Peter's. Walk down to Trastevere for dinner and catch the sunset from the Pincio terrace.

Want a food-only version of this plan?
Upload a photo of Rome on the reply card, tick Sources with a count of 12, and add two follow-ups: Best gelato near the Pantheon and Is the Roma Pass worth it?.
Press Play. The question is typed with the suggestions above it, the dots pulse for a second and a half, the plan is revealed from top to bottom with its two headings, the photo sharpens as it appears, and the sources pill, the action row and the follow-ups fade in at the end.
Making variations quickly
Once one clip works, the next one is mostly editing text:
- Change the topic, keep the shape. Rewrite the question and the reply; the headings, photo, sources and follow-ups keep their places.
- Add a second round. Add another You card and another Grok card. The chat scrolls up as the new turns come in, and every reply gets its own footer.
- Switch the theme. The same clip in dark mode is a second video for free.
- Cut the footer. Untick Action row and Sources and clear the follow-ups for a minimal answer that ends the clip cleanly.
Writing tips that make it believable
- Write like Grok. The app's answers are friendly and a little punchy: a short opening line with an emoji, a few headings, then a question back to the user at the end.
- Keep paragraphs short. Two or three lines per paragraph read well on a phone screen and reveal nicely.
- Use headings for structure, not decoration. Two or three headings in a long answer is plenty.
- Match the photo to the answer. A photo of the place, the dish or the product the answer is about looks like a search result; a random one does not.
- Make the follow-ups specific. "Best gelato near the Pantheon" looks real; "Tell me more" does not.
- Mind the timing. A clip under 30 seconds holds attention best. A long answer at a faster reveal speed is better than a short answer that drags.
Using AI to write the conversation
If you would rather not write the whole script, use Describe it, the AI panel at the top of the editor. Write one sentence about the clip you want, such as "asking Grok to plan a weekend in Rome, it thinks, then shows a plan with sources", and MockClip's AI drafts the questions, the reply, the headings, the sources count, the follow-ups and the timing. You can then edit every field by hand. Describe it needs a Google or GitHub sign-in to MockClip; the manual editor does not. Read more in the guide to Describe it, the AI fake chat video generator.
If you work with an AI assistant that supports MCP, the same template is available as the create_grok_conversation tool, which returns a link that opens the clip in the editor.
Troubleshooting
- The photo does not show. Upload it with the file picker on the reply card. A shared
?config=link does not carry uploaded images, so a clip opened from a link has no photo until you upload it again. - The photo is sharp at once. Check Sharpen (s) on the reply card. With 0, the photo appears sharp as soon as the reveal reaches it.
- No suggestions appear while typing. The suggestions box is empty, or the question is not typed (Typed on the keyboard is unticked).
- The heading looks like normal text. The line must start with
##followed by a space. - The clip is too long. Lower the thinking times, raise the reveal speed or remove the model picker from the Video flow.
Where to go next
Comparing AI chat templates for a project? The post on Grok vs Gemini vs ChatGPT chat video templates shows what each one draws. For a Google-style assistant, see the guide to making a fake Gemini chat video, and for streaming text with a cursor and markdown, the ChatGPT template.
Free to use. No sign-up. Browser-based.
Make a fake Grok chatFrequently Asked Questions
How do I make a fake Grok chat video?
Open MockClip's Grok template, write your question and Grok's reply, add a photo, a sources count and follow-up questions if you want them, set the typing speed, thinking time and reveal speed, arrange the chat and the model picker in Video flow, then press Play and export an MP4 or GIF.
Does the template use the real Grok?
No. Every question and every reply is text you write. Nothing is sent to xAI or to any AI model. The optional Describe it panel uses MockClip's own AI to draft a script, which you then edit.
Can Grok's replies include headings, images or code?
Headings and images, yes. Lines that start with '## ' are drawn as headings, lines that start with '* ' or '- ' as bullet points, and a reply can carry one photo you upload, shown where a line reads [image]. Code blocks, tables, bold text and coloured links are not drawn.
What are the search suggestions above the input bar?
While your question is typed, a few suggested searches appear above the input bar, the way the app offers them. You write the suggestions yourself, one per line; the part of each one that matches what you have typed so far is drawn darker. Leave the list empty to hide them.
Do I need an X, Grok or MockClip account?
No X or Grok account is involved at all. The manual editor works without a MockClip account. Describe it, the AI drafting panel, needs a Google or GitHub sign-in to MockClip.
Which formats can I export?
MP4 or GIF, at 720p or Full HD and 15 to 30 fps (60 fps on the Creator plan), with or without the iPhone bezel. Vertical 9:16 suits TikTok, Reels and Shorts, and a 1:1 square crop suits feeds.
Related Articles
Grok vs Gemini vs ChatGPT Chat Video Templates Compared
MockClip's Grok, Gemini and ChatGPT templates side by side: reply animation, thinking, formatting, images, sources and screens. Pick the right AI chat video.
How to Make a Fake Gemini Chat Video (Free, in Browser)
Step-by-step: write, time and export a fake Gemini chat video in your browser, with the typed question, the thinking sparkle and a fading-in reply. Free.
How to Create a Fake ChatGPT Conversation Video
The complete 2026 guide to creating realistic fake ChatGPT conversation videos for TikTok, YouTube Shorts, and Reels — no coding, no editing, free.
AI Fake Chat Video Generator: Describe It, Get the Clip
Type what the clip should be and MockClip's Describe it mode writes the messages and timing for WhatsApp, iMessage, ChatGPT, Tinder and more. Refine by second.