How to Make a Fake Copilot Chat Video (Free, in Browser)
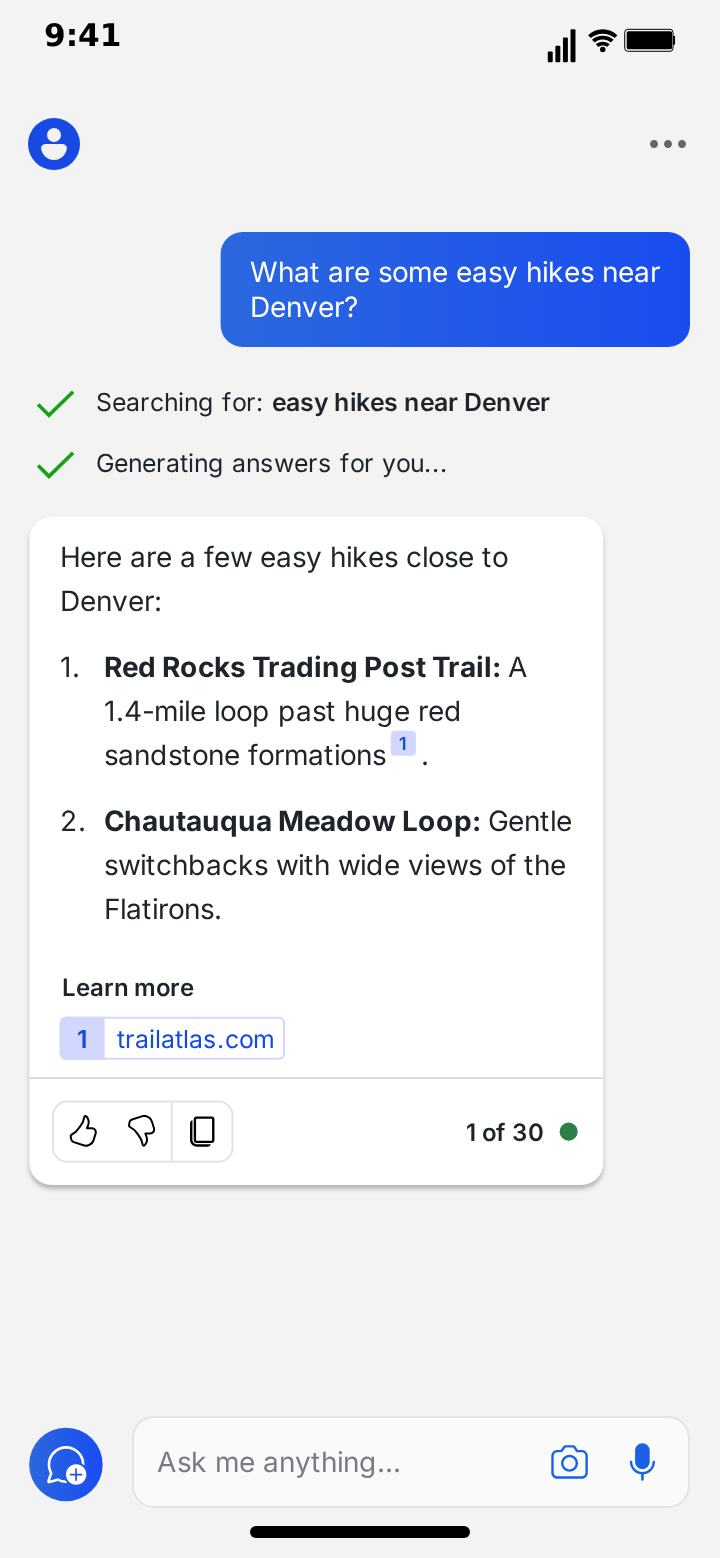
MockClip's Copilot template turns a conversation you write into an animated phone screen that looks like the Copilot app on an iPhone. Your question is typed into the "Ask me anything..." bar with the keyboard up and sent as a blue bubble. While Copilot works, its search steps appear one by one and tick off, and a Stop Responding button shows above the bar. The answer is then revealed from top to bottom inside a white card, with bold text, a numbered list, small citation badges and the sources under "Learn more", and the action row with its reply counter fades in at the end.
This guide walks through the whole process, from an empty editor to an exported MP4, and ends with a complete example script you can copy. It takes about ten minutes the first time and two or three once you know where everything is.
Every word in the clip is yours. Nothing is sent to Microsoft or to any AI model, and MockClip is not affiliated with Microsoft. Use the template for skits, explainers, tutorials and storytelling, and keep the content fictional or your own.
What you will make
A finished Copilot clip plays like a short screen recording of someone using the app:
- The question. A new chat opens on Copilot's home screen: the Copilot logo, the tagline and three idea cards. Your question is typed into the input bar letter by letter with the iOS keyboard up, and when it is sent it lands as a blue bubble on the right as the home screen gives way to the chat. You can attach a photo to it, and it shows inside the bubble under the text.
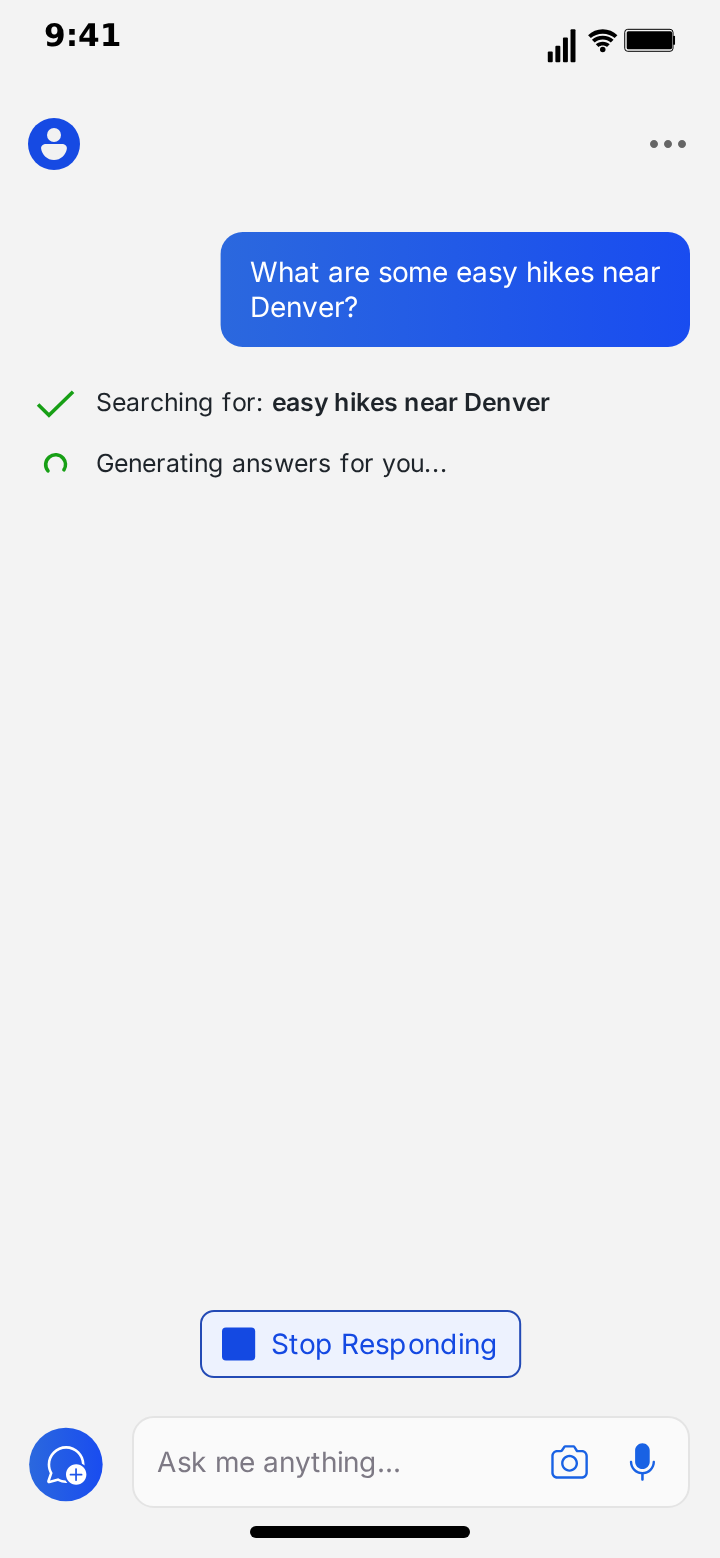
- The steps. Lines such as "Searching for: easy hikes near Denver" appear one by one under your message, each with a spinner that turns into a green check before the next one starts. A Stop Responding button fades in above the input bar.
- The reply card. The answer appears from top to bottom inside a white card that grows as the text is revealed. Paragraphs, bold text, numbered lists and citation badges are kept.
- The footer. The sources under "Learn more" and the action row (thumbs up, thumbs down, copy and a "1 of 30" counter) fade in, the card grows to hold them, and the Stop button fades out.
- The menu. In the default clip, the ⋯ menu then opens over the chat (New topic, Chat history, Rename, Feedback, Delete, Show All Tones).
You can drop or reorder any of these steps, add more questions and answers, switch to the dark theme and change every text on screen.
Step 1: Open the Copilot template
Go to mockclip.com/app/copilot. The editor opens with a default clip already loaded: a question about easy hikes near Denver, two search steps, and a reply with a numbered list, a citation badge and one source. Press Play under the preview to watch it once before you change anything. It is the quickest way to see what each setting does.
The editor sits next to the preview (or under it on a phone). At the top are the screen tabs (Chat, Home, Conversation style, Camera, Share, Menu) and the Video flow strip; under them the settings; under the settings the conversation itself. Everything you change shows up in the preview straight away.
You do not need an account to use the manual editor. If you want the AI to draft the conversation for you, see Using AI to write the conversation below.
Step 2: Choose the theme and the keyboard
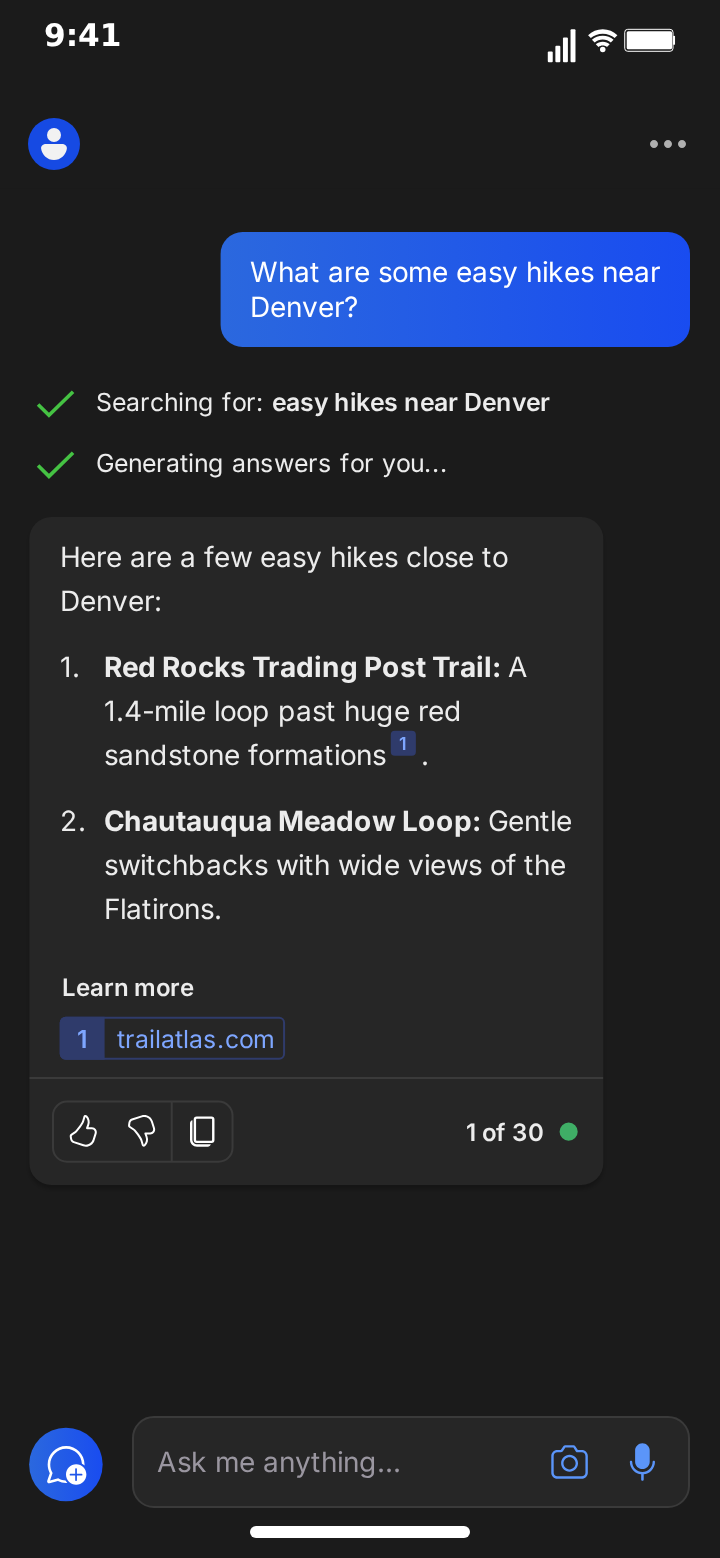
The template opens in the light theme, which is how the design it is built from looks. A dark theme is one setting away: pick Dark under Theme and the background turns near-black, the reply card turns dark grey and the text turns white. The blue question bubble and the green checks stay as they are.
The Keyboard setting decides when the iOS keyboard is on screen:
- Up while you type (the default): the keyboard slides up when a question starts being typed and down again when it is sent.
- Always up: the keyboard stays up for the whole clip, and the input bar sits on top of it.
- Never: no keyboard. Typed questions still appear letter by letter in the input bar.
Under those are the sound effects switch and the watermark setting. Free exports carry a small MockClip watermark; paid plans remove it. See the pricing page for what each plan includes.
Step 3: Write your question
In the Conversation section, the first card is your message. The role selector at the top of the card says You. Type the question in the text box, as you would ask it in the app.
Under the text box are the timing controls for your turn:
- Wait (s): how long the clip pauses before this turn starts. The default is half a second.
- Typed on the keyboard: when ticked (the default), the question is typed into the input bar letter by letter with the keyboard up. Untick it and the question appears in the chat at once.
- Chars/s: the typing speed, 14 characters per second by default.
A photo. Use the Photo file picker on your message to attach a picture. It shows inside your bubble under the text, the way Copilot shows an image you ask about. "What is this place?" or "What plant is this?" with a photo makes a quick, recognisable clip.
Step 4: Write the steps
Copilot shows what it is doing before it answers. On the reply card, the box under the text takes these steps, one per line:
Searching for: **easy hikes near Denver**
Generating answers for you...
Each step appears in turn with a spinning green arc, which becomes a check when the next step starts. Text between double asterisks is drawn bold, as the app shows the search terms. By default each step takes 0.9 seconds, so two steps take 1.8 seconds; set Thinking (s) on the card to change the total. Leave the box empty and the reply card simply appears after the thinking time.
Step 5: Write Copilot's reply
Click + Copilot to add a reply card, or edit the one that is already there. Type the answer into the text box. A few simple rules decide how it is drawn:
- Blank lines separate paragraphs. Leave an empty line between paragraphs and between list items, the way Copilot spaces its answers.
- Bold. Text between double asterisks, such as
**Red Rocks Trading Post Trail:**, is drawn bold. - Numbered lists. A line that starts with
1.,2.and so on becomes a numbered item with a hanging indent. Lines that start with*or-become bullet points. - Citation badges.
[^1]right after a word draws a small blue badge with the number 1, raised a little above the line, matching the first source.
Headings, code blocks and tables are not drawn, so write around them: a short numbered list instead of a table, a bold label instead of a heading.
Step 6: Add the sources
Under the steps box, + Source adds a source to the reply. Type its label, usually a website name such as trailatlas.com, and optionally pick a small icon for it. Sources are numbered in order, so the first one is [^1] in the text, the second [^2] and so on.
When the reply is done, the sources fade in under a "Learn more" label as numbered chips, then the action row appears under a thin line. The Label over the sources field under the conversation changes "Learn more", and Replies counted out of sets the 30 in the "1 of 30" counter. The counter's first number follows the reply: the second reply in a clip shows "2 of 30".
The sources are labels you type, drawn as chips; nothing is looked up or linked. Use fictional or generic site names, or your own.
Step 7: Set the reveal timing
Each reply card has its own timing:
- Wait (s): the pause before the reply starts, half a second by default.
- Thinking (s): how long the steps take in total (0.9 seconds per step by default, 1.2 seconds without steps).
- Stream chars/s: how fast the answer is revealed, 100 characters per second by default. The reply always appears as one block from top to bottom, and the card grows with it.
- Action row: untick it for a reply without the sources and the action row.
For a natural rhythm, keep each step under a second and the reveal speed between 60 and 150 characters per second. The Stop Responding button shows from the first step until the reply is complete, so a longer answer keeps it on screen longer.
Step 8: Arrange the video flow
The Video flow strip at the top of the editor lists the screens the clip walks through, in order. The default is the chat, then the ⋯ menu.
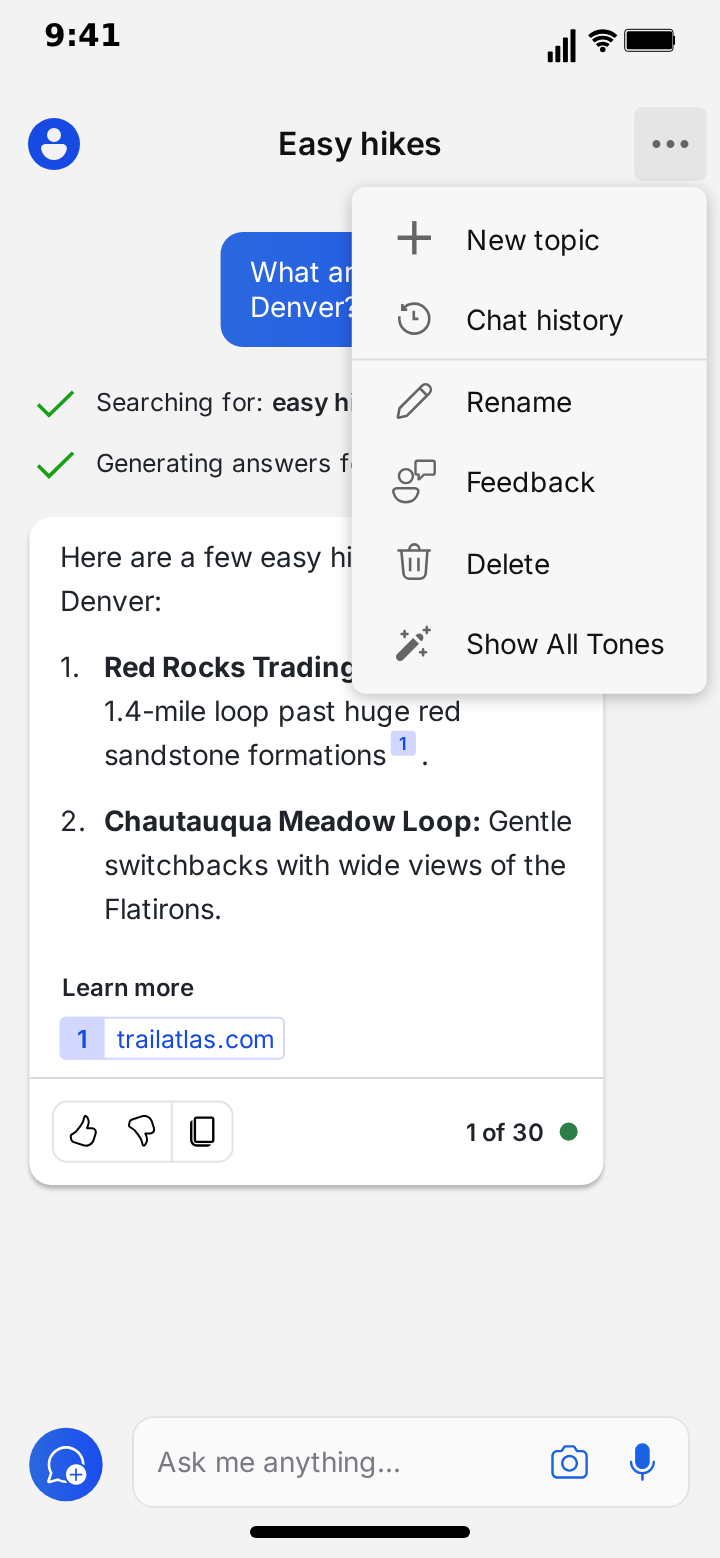
- The menu fades in over the chat at the top right, with the conversation's name in the top bar (set it on the Menu tab).
- The share sheet slides up from the bottom over a dimmed chat (Forward, Copy link, Open in default browser, Share, Search settings).
- The conversation-style screen shows the More Creative, More Balanced and More Precise picker with the idea cards.
- The camera screen is the "Use images to chat with Copilot" viewfinder.
- The chat step itself starts on the home screen (the Copilot logo, the tagline and the idea cards) while the first question is typed. Untick Typed on the keyboard on the first message and the home screen gives way to the chat almost at once.
Hold sets how long each step stays on screen; the chat step plays the whole conversation, so its length follows your messages. Show taps draws a small touch indicator where the user taps before each move, such as the ⋯ button before the menu opens.
Step 9: Preview and export
Press Play under the preview to watch the clip from the start, and drag the timeline to check a single moment. When it looks right, open the export settings:
- Format: MP4 video or GIF animation.
- Resolution: 720p or Full HD.
- Frame rate: 15 to 30 fps, or 60 fps on the Creator plan.
- Frame: with or without the iPhone bezel, and the aspect ratio, including a 1:1 square crop.
The export is rendered in your browser and downloads when it is done. For TikTok, Reels and YouTube Shorts, export vertical 9:16 MP4 at 30 fps; for a GIF in a blog post or a chat, 15 fps keeps the file small.
A complete example script
Here is a short conversation that shows off every part of the template. Copy each turn into its own card.
You (typed): how do I learn Spanish in 3 months?
Copilot steps:
Searching for: **learn Spanish in 3 months**
Generating answers for you...
Copilot reply:
Three months is enough for solid basics if you practise every day:

1. **Weeks 1–4:** learn the 500 most common words and the present tense with a spaced-repetition app[^1].

2. **Weeks 5–8:** add 20 minutes of listening a day, podcasts or shows with Spanish subtitles.

3. **Weeks 9–12:** book two conversation sessions a week and keep a short daily journal in Spanish.
Add one source, languagelab.example, and keep Action row ticked.
Press Play. The question is typed and sent, the two steps tick off, the Stop button fades in, the plan is revealed in its card with the bold week labels and the badge after "app", and the source, the action row and "1 of 30" fade in at the end.
Making variations quickly
Once one clip works, the next one is mostly editing text:
- Change the topic, keep the shape. Rewrite the question, the steps and the reply; the card, the badges and the sources keep their places.
- Add a second round. Add another You card and another Copilot card. The chat scrolls up as the new turns come in, and the second reply's counter reads "2 of 30".
- Switch the theme. The same clip in dark mode is a second video for free.
- Ask about a photo. Attach a photo to the question and write a reply that describes it.
Writing tips that make it believable
- Write like Copilot. Its answers open with a one-line summary, then a numbered list with a bold label at the start of each item.
- Make the steps specific. "Searching for: easy hikes near Denver" looks real; "Searching..." does not. Repeat the key words of the question.
- Cite where it matters. One or two badges on concrete facts (a distance, a date, a number) look natural; a badge on every sentence does not.
- Keep paragraphs short. Two or three lines per paragraph read well on a phone screen and reveal nicely.
- Mind the timing. A clip under 30 seconds holds attention best. A long answer at a faster reveal speed is better than a short answer that drags.
Using AI to write the conversation
If you would rather not write the whole script, use Describe it, the AI panel at the top of the editor. Write one sentence about the clip you want, such as "asking Copilot for a weekend hiking plan, it searches, then answers with a numbered list and a source", and MockClip's AI drafts the question, the steps, the reply, the sources and the timing. You can then edit every field by hand. Describe it needs a Google or GitHub sign-in to MockClip; the manual editor does not. Read more in the guide to Describe it, the AI fake chat video generator.
If you work with an AI assistant that supports MCP, the same template is available as the create_copilot_conversation tool, which returns a link that opens the clip in the editor.
Troubleshooting
- The text shows the asterisks. Bold needs a pair:
**like this**, with no space after the opening pair. - The badge shows as [^1]. The badge is drawn only in replies; check the brackets and the caret:
[^1]. - The list items are not numbered. The line must start with the number, a full stop and a space:
1.. - The photo does not show. Upload it with the file picker on your message. A shared
?config=link does not carry uploaded images. - The steps flash by. Each step takes 0.9 seconds by default; raise Thinking (s) on the reply card for slower steps.
- The clip is too long. Lower the thinking times, raise the reveal speed or remove the menu from the Video flow.
Where to go next
For other AI assistants, see the guides to making a fake Grok chat video and a fake Gemini chat video, and for streaming text with a cursor and markdown, the ChatGPT template.
Free to use. No sign-up. Browser-based.
Make a fake Copilot chatFrequently Asked Questions
How do I make a fake Copilot chat video?
Open MockClip's Copilot template, write your question and Copilot's reply, add the search steps and sources if you want them, set the typing speed, step time and reveal speed, arrange the chat and the menu in Video flow, then press Play and export an MP4 or GIF.
Does the template use the real Copilot?
No. Every question, step, source and reply is text you write. Nothing is sent to Microsoft or to any AI model, and the sources are labels, not real links. The optional Describe it panel uses MockClip's own AI to draft a script, which you then edit.
Can Copilot's replies include bold text, lists or citations?
Yes. Text between double asterisks is drawn bold, lines that start with '1. ' become a numbered list, lines that start with '* ' or '- ' become bullet points, and [^1] draws a small numbered citation badge that matches the first source under 'Learn more'. Headings, code blocks and tables are not drawn.
What are the steps above the reply?
While Copilot works, the app shows what it is doing, such as 'Searching for: easy hikes near Denver' and 'Generating answers for you...'. You write these lines yourself, one per line; each appears with a spinner that turns into a green check before the next one starts, and then the reply card appears under them.
Do I need a Microsoft or MockClip account?
No Microsoft account is involved at all. The manual editor works without a MockClip account. Describe it, the AI drafting panel, needs a Google or GitHub sign-in to MockClip.
Which formats can I export?
MP4 or GIF, at 720p or Full HD and 15 to 30 fps (60 fps on the Creator plan), with or without the iPhone bezel. Vertical 9:16 suits TikTok, Reels and Shorts, and a 1:1 square crop suits feeds.
Related Articles
How to Make a Fake Grok Chat Video (Free, in Browser)
Step-by-step: write, time and export a fake Grok chat video in your browser, with search suggestions, thinking dots, headings, a photo and sources. Free.
How to Make a Fake Gemini Chat Video (Free, in Browser)
Step-by-step: write, time and export a fake Gemini chat video in your browser, with the typed question, the thinking sparkle and a fading-in reply. Free.
How to Create a Fake ChatGPT Conversation Video
The complete 2026 guide to creating realistic fake ChatGPT conversation videos for TikTok, YouTube Shorts, and Reels — no coding, no editing, free.
AI Fake Chat Video Generator: Describe It, Get the Clip
Type what the clip should be and MockClip's Describe it mode writes the messages and timing for WhatsApp, iMessage, ChatGPT, Tinder and more. Refine by second.